How to use iloc and loc for Indexing
How to use iloc and loc for Indexing and Slicing Pandas Dataframe

In this post, we are going to work with Pandas iloc, and loc. More specifically, we are going to learn slicing and indexing by iloc and loc examples.
Once we have a dataset loaded as a Pandas dataframe, we often want to start accessing specific parts of the data based on some criteria. For instance, if our dataset contains the result of an experiment comparing different experimental groups, we may want to calculate descriptive statistics for each experimental group separately.

The procedure of selecting specific rows and columns of data based on some criteria is commonly known as slicing.
Table of Contents
Pandas Dataframes
Before we are going to learn how to work with loc and iloc, we are it can be good to have a reminder on how Pandas dataframe object work. For the specific purpose of this indexing and slicing tutorial it is good to know that each row and column, in the dataframe, has a number – an index.

This structure, a row-and-column structure with numeric indexes, means that we can work with data by using the row and the column numbers. This is useful to know when we are going to work with Pandas loc and iloc methods.
See also the blog post using Pandas and pyjanitor, to learn about some easy Python data cleansing methods.
Data
In the following iloc and loc example we are going to work with two datasets. These datasets, among a lot of other RDatasets, can be found here but the following code will load them into Pandas dataframes:
If you are interested in learning more about in-and-out methods of Pandas make sure to check the following posts out:
Before going on and working with Pandas iloc and Pandas loc, we will answer the question concerning the difference between loc and iloc.
What is the Difference Between loc and iloc?
First of all, .loc is a label based method whereas .iloc is an integer-based method. This means that iloc will consider the names or labels of the index when we are slicing the dataframe. For example, if “case” would be in the index of a dataframe (e.g., df), df.loc['case'] will result in that the third row is being selected. Note, in the loc and iloc examples below we will work with the first column, in the dataset, as index (see first code chunk). On the other hand, Pandas .iloc takes slices based on index’s position. Unlike .loc, .iloc behaves like regular Python slicing. That is, we just indicate the positional index number, and we get the slice we want. For example, df.iloc[2] will give us the third row of the dataframe. This is because, just like in Python, .iloc is zero positional based. That is it starts at 0. We will learn how we use loc and iloc, in the following sections of this post.
What does iloc do in Pandas?
As previously mentioned, Pandas iloc is primarily integer position based. That is, it can be used to index a dataframe using 0 to length-1 whether it’s the row or column indices. Furthermore, as we will see in a later Pandas iloc example, the method can also be used with a boolean array.

In the image below, we can see a quick example of how to work with Pandas df.loc[] method.

Link to the Pandas loc example
Here’s a short YouTube video in which you can learn how to work with both loc and iloc:
In this Pandas iloc tutorial, we are going to work with the following input methods:
An integer, e.g. 2
A list of integers, e.g. [7, 2, 0]
A slice object with ints, e.g. 0:7, as in the image above
A boolean array.
How to use Pandas iloc
Now you may be wondering “how do I use iloc?” and we are, of course, going to answer that question. In the simplest form we just type an integer between the brackets.
As can be seen in the Pandas iloc example, above, we typed a set of brackets after the iloc method.
Furthermore, we added an integer (0) as index value to specify that we wanted the first row of our dataframe. Note, when working with .iloc it’s important to know that order of the indexes inside the brackets obviously matters.
The first index number will be the row or rows that we want to retrieve. If we wat to retrieve a specific column, or specific columns, using iloc we input a second index (or indices). This, however, is optional and without a second index, iloc will retrieve all columns by default.
Pandas iloc syntax is, as previously described, DataFrame.iloc[<row selection>, <column selection>].
This may be confusing for users of the R statistical programming environment. To iterate, the iloc method in Pandas is used to select rows and columns by number, in the order that they appear in the dataframe.
Pandas iloc Examples
In the next section, we continue this Pandas indexing and slicing tutorial by looking at different examples of how to use iloc. We have, of course, already started with the most basic one; selecting a single row:
Indexing the last Row of a Pandas dataframe
In the next example, we are continuing using one integer to index the dataframe. However. if we want to retrieve the last row of a Pandas dataframe we use “-1”:
We can also input a list, with only one index integer, when we use iloc. This will index one row but the output will be different compared to the example above:

pSelect Multiple Rows using iloc
We can, of course, also use iloc to select many rows from a pandas dataframe. For instance, if we add more index integers to the list, like in the example above, we can select many rows.

Slicing Rows using iloc in Pandas
In the next Pandas iloc example, we are going to learn about slicing. Note, we are going to get more familiar using the slicing character “:” later in this post. To select row 11 to 15 we type the following code:

Selecting Columns with Pandas iloc
As previously indicated, we can, of course, when using the second argument in the iloc method also select, or slice, columns. In the next iloc example, we may want to retrieve only the first column of the dataframe, which is the column at index position 0.
To do this, we will use an integer index value in the second position inside of the brackets when we use iloc. Note, the integer index in the second position specifies the column that we want to retrieve. What about the rows?
Note, that when we want to select all rows and one column (or many columns) using iloc we need to use the “:” character.

In the Pandas iloc example above, we used the “:” character in the first position inside of the brackets. This indicates that we want to retrieve all the rows. A reminder; the first index position inside of [], specifies the rows, and we used the “:” character, because we wanted to get all rows from a Pandas dataframe.
In the next example of how to use Pandas iloc, we are going to take a slice of the columns and all rows. This can be done in a similar way as above. However, instead of using an integer we use a Python slice to get all rows and the first 6 columns:

Select a Specific Cell using iloc
In this section, of the Pandas iloc tutorial, we will learn how to select a specific cell.
This is quite simple, of course, and we just use an integer index value for the row and for the column we want to get from the dataframe. For example, if we want to select the data in row 0 and column 0, we just type df1.iloc[0, 0].
Of course, we can also select multiple rows and/or multiple columns. To do this we just add a list with the integer indices that we want iloc to select for us.
For example, if we want to select the data in row 4 and column 2, 3, and 4 we just use the following code:
Retrieving subsets of cells
In the next iloc example, we are going to get a subset of cells from the dataframe.
Achieving this is a combination of getting a slice of columns and a slice of rows with iloc:
Selecting Columns using a Boolean Mask
In the final example, we are going to select columns using a boolean mask. Doing this, of course, require us to know how many columns there are and which columns we want to select.

How to Use Pandas loc
In this section, we are covering another Pandas method, i.e. loc for selecting data from dataframes.

When to use loc?
Remember, whereas iloc takes the positional references as the argument input while loc takes indexes as the argument. As loc takes indexes, we can pass strings (e.g., column names) as an argument whereas it will throw an error if we used strings with iloc. So the answer to the question when to use Pandas loc? is when we know the index names.
In this loc tutorial we are going to use the following inputs:
A single label, for instance 2 or ‘b’. It is worth noting here that Pandas interpret 2 as a label of the index and not as an integer position along the index (contrary to iloc)
A list of labels, for instance [‘a’, ‘b’, c’]
A slice object with labels, for example,. ‘shortname’:’SASname’. Importantly, when it comes to slices when we use loc, BOTH the start and stop are included
Select a Row using Pandas loc
In the first Pandas loc example, we are going to select data from the row where the index is equal to 1.
Note, in the example above the first row has the name “1”. That is, this is not the index integer but the name.
Pandas loc behaves the in the same manner as iloc and we retrieve a single row as series. Just as with Pandas iloc, we can change the output so that we get a single row as a dataframe. We do this by putting in the row name in a list:

Slicing Rows using loc
In the next code example, we are going to take a slice of rows using the row names.

We can also pass it a list of indexes to select required indexes.

Selecting by Column Names using loc
Unlike Pandas iloc, loc further takes column names as column argument. This means that we can pass it a column name to select data from that column.
In the next loc example, we are going to select all the data from the ‘SASname’ column.
Another option is, of course, to pass multiple column names in a list when using loc. In the next example, we are selecting data from the ‘SASname’, and ‘longname’ columns where the row names are from 1 to 5.

Slicing using loc in Pandas
In this section, we will see how we can slice a Pandas dataframe using loc. Remember that the “:” character is used when slicing. As with iloc, we can also slice but here we can column names and row names (like in the example below).
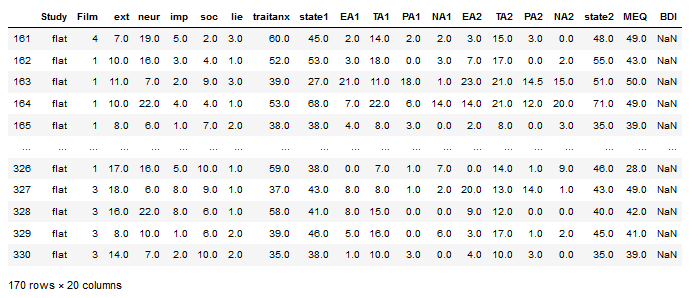
In the loc example below, we use the first dataframe again (df1, that is) and slice the first 5 rows and take the columns from the ‘Film’ column to the ‘EA1’ column
Pandas iloc and Conditions
Many times we want to index a Pandas dataframe by using boolean arrays. That is, we may want to select data based on certain conditions. This is quite easy to do with Pandas loc, of course. We just pass an array or Seris of True/False values to the .loc method.
For example, if we want to select all rows where the value in the Study column is “flat” we do as follows to create a Pandas Series with a True value for every row in the dataframe, where “flat” exists.
Select Rows using Multiple Conditions Pandas iloc
Furthermore, some times we may want to select based on more than one condition. For instance, if we want to select all rows where the value in the Study column is “flat” and the value in the neur column is larger than 18 we do as in the next example:

As before, we can use a second to select particular columns out of the dataframe. Remember, when working with Pandas loc, columns are referred to by name for the loc indexer and we can use a single string, a list of columns, or a slice “:” operation. In the next example, we select the columns from EA1 to NA2:

Setting Values in dataframes using .loc
In the last section, of this loc and iloc tutorial, we are going to learn how to set values to the dataframe using loc.
Setting values to a dataframe is easy all we need is to change the syntax a bit, and we can actually update the data in the same statement as we select and filter using .loc indexer. This is handy as we can to update values in columns depending on different conditions.
In the final loc example, we are going to create a new column (NewCol) and add the word “BIG” there in the rows where neur is larger than 18:
Conclusion
In this Pandas iloc and loc tutorial we have learned indexing, selecting, and subsetting using the loc and iloc methods. More specifically, we have learned how these methods work. When it comes to loc we have learned how to select based on conditional statements (e.g., larger than or equal to) as well as that we have learned how to set values using loc.
Last updated