GIT Push and Pull
Learn how to perform Git PUSH and PULL requests through GitHub Desktop and the Command-Line.
You'll be using GitHub for this tutorial as it is widely used, however, Bitbucket, Gitlab, etc. are also popular, but Developers, Data Scientists, and Data Analysts mostly use the GitHub to PUSH and do PULL Request.
GIT PUSH
Using Command line to PUSH to GitHub.
Using GitHub Desktop to PUSH to your local content to GitHub.
PULL Request
PULL Request through Command Line.
PULL Request through GitHub Desktop.
You can easily follow along with all of the materials in the tutorial, even if you are a beginner. However, if you don't have any concept about Git, then have a look at Git Tutorial for Beginners: Command-Line Fundamentals and set up your environment by using GIT SETUP: The Definitive Guide.
You do need to have a GitHub account. If you don't, you can create one here.
Git PUSH
The git push command is used to transfer or push the commit, which is made on a local branch in your computer to a remote repository like GitHub. The command used for pushing to GitHub is given below.
git push 'remote_name' 'branch_name'
In this tutorial, you'll be looking two different ways to PUSH to GitHub.
Using Command line to PUSH to GitHub
1. Creating a new repository.
You need to create a new repository and click on the plus sign.
Fill up all the required details, i.e., repository name, description and also make the repository public this time as it is free.

2. Open your Git Bash.
Git Bash can be downloaded in here, and it is a shell used to interface with the operating system which follows the UNIX command.
3. Create your local project in your desktop directed towards a current working directory.
pwdstands for 'print working directory', which is used to print the current directory.Move to the specific path in your local computer by
cd 'path_name'. The cd commands stand for 'change directory' and it is used to change to the working directory in your operating system, and to locate your file,'path_name', i.e.,C:/Users/Dell/Downloads/FaceDetect-masterneeds to be given. This command can identify the required file that you are looking to work with.

4. Initialize the git repository
Use
git initto initialize the repository. It is used to create a new empty repository or directory consisting of files' with the hidden directory. '.git' is created at the top level of your project, which places all of the revision information in one place.

5. Add the file to the new local repository.
Use
git add .in your bash to add all the files to the given folder.Use
git statusin your bash to view all the files which are going to be staged to the first commit.
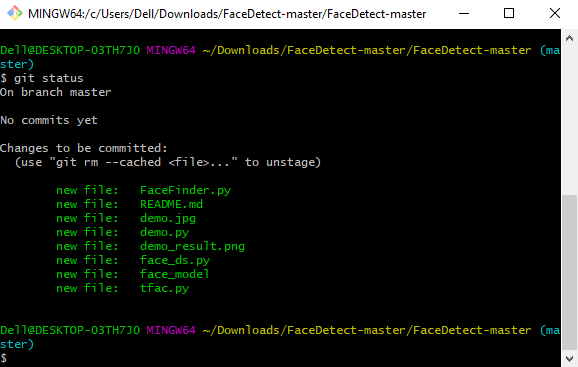
6. Commit the files staged in your local repository by writing a commit message.
You can create a commit message by
git commit -m 'your message', which adds the change to the local repository.git commituses '-m' as a flag for a message to set the commits with the content where the full description is included, and a message is written in an imperative sentence up to 50 characters long and defining "what was changed", and "why was the change made".

7. Copy your remote repository's URL from GitHub.
The HTTPS or URL is copied from the given GitHub account, which is the place of the remote repository.

8. Add the URL copied, which is your remote repository to where your local content from your repository is pushed.
git remote add origin 'your_url_name'In the above code, The 'origin' is the remote name, and the remote URL is "https://github.com/Olivia-Smithcoder100/FaceDetection.git". You can see the remote as GitHub in this case, and GitHub provides the URL for adding to the remote repository.
9. Push the code in your local repository to GitHub
git push -u origin masteris used for pushing local content to GitHub.In the code, the origin is your default remote repository name and '-u' flag is upstream, which is equivalent to '-set-upstream.' and the master is the branch, name.upstream is the repository that we have cloned the project.
Fill in your GitHub username and password.

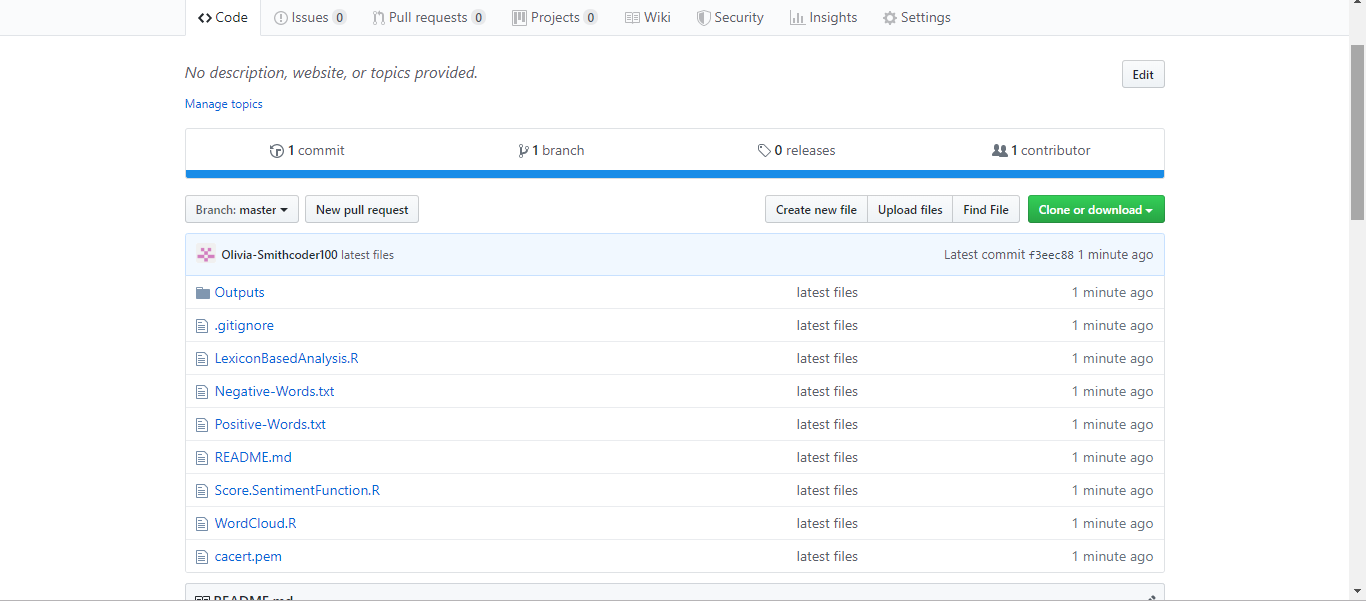
10. View your files in your repository hosted on GitHub.
You can finally see the file hosted on GitHub.

Using GitHub Desktop to PUSH to your local content to GitHub.
GitHub Desktop is available to download for any operating system, and it gives the GUI(Graphical User Interface) platform to push your local content from your local repository to a remote repository like GitHub.
You need to open your GitHub account in your browser and the process of creating a new repository, i.e., step 1 is the same as mentioned above in "Using Command line to PUSH to GitHub".
1. Click "Set up in a Desktop".
You need to click on the button, as shown below where a pop up comes, and you click on "Open GitHub desktop".


2. Cloning in a GitHub Desktop.
You can click the "Clone" button, as shown below.
 After cloning a new clone, the folder is created in your local computer where a hidden directory ".git" is also present.
3. Copy all the required files from your local computer into the clone folder on your computer.
You need to copy all the required files, images, README files, etc., to the clone folder.

4. Move to GitHub Desktop and commit to master
You can see the files that are added into the clone folder are seen in GitHub Desktop too. Finally, write your message and push "Commit to master".
5. Publish branch in GitHub Desktop to upload your all files to GitHub.

You can click on "Publish Branch" to publish your all local content to GitHub. You can view your repository in GitHub after you have completed all steps.

PULL Request
If you make a change in a repository, GIT PULL can allow others to view the changes. It is used to acknowledge the change that you've made to the repository that you're working on. Or also called a target repository.
The simple command to PULL from a branch is:
git pull 'remote_name' 'branch_name'.
The git pull command is a combination of git fetch which fetches the recent commits in the local repository and git merge, which will merge the branch from a remote to a local branch also 'remote_name' is the repository name and 'branch_name' is the name of the specific branch.
You"ll be looking at two different ways on how to use the PULL request.
PULL Request through Command Line.
You can see the README files below which contains a typo. The README file has the word "contain" misspelled as "containnns". The owner of this repository is MNALO, and Olivia is the collaborator. She will solve the error and submit a PULL Request You'll see the process for making a PULL Request through a particular example given below.
In the file above, you can see a typo in the word "containnns".

1. Fork the Repository.
"The "Fork" is a copy of a repository. Forking a repository allows you to freely experiment with changes without affecting the original project."(Source)

2. Open your bash in your computer.
You need to move to the required path or folder by using the
cdcommand, and the content can be viewed by using thelscommand, which will list all of the present files in the directory and in our case you can see the 'README.md' is present.

3. Make a new branch
You can create a new branch by using the
git checkout -b 'branch_name'.In the above code, '-b' flag is used to create a new branch, and 'branch_name' is used to give the branch a specific name, and with checkout, the branch is switched to the newly created branch.

4. Make a change by using vim from bash or direct replacement from the original README file.
You can change the word "containnns" to "contains" in the README file, and the changes with the current status can be viewed by using the following command.
5. Adding and Committing a file to the repository.


Deleting a Branch after the PULL Request is Merged.
You need to move to the main page of the repository and click "Pull requests".

PULL Request through GitHub Desktop
The file "imp" contains a typo where MNALO is the owner and Olivia is collaborator follows the following process to create a PULL request from GitHub Desktop.
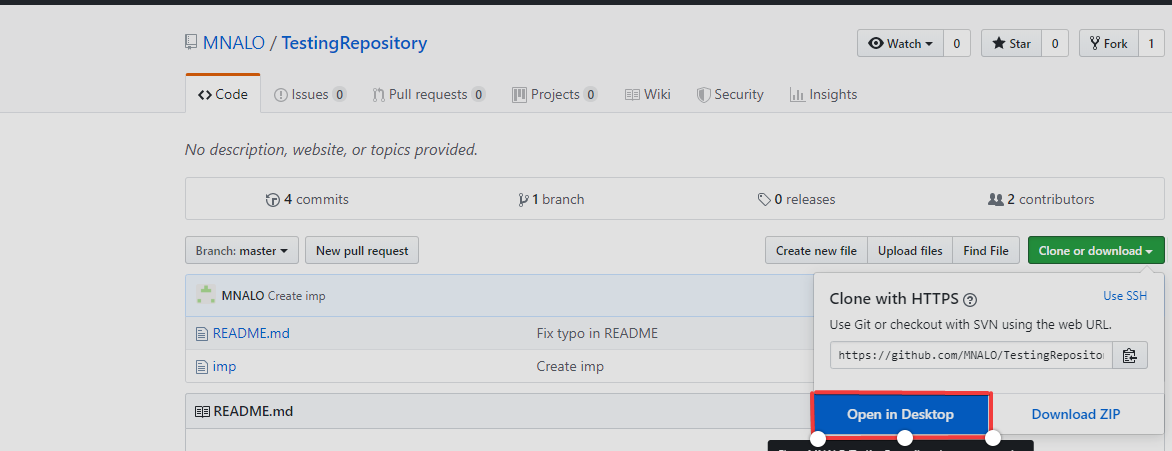
1. Cloning and Opening to Desktop.
A project is cloned and click to "Open in Desktop".
2. Create a new branch.
A new branch, "fix-typo-imp" is created.

3. Make a change in the imp file from the text editor.
You can change the content of the imp file, fix a typo, and add some text.
4. Commit the changes.
A commit message written and "Commit to fix-typo-imp" is clicked.

5. Publish the branch.
You can now publish the branch, which pushes the commit to GitHub.

6. Create a PULL Request.
You can now make a PULL request by clicking "Create pull request".
You can also now write a message and then click "Create pull request" again.

The process afterward is the same as above in "PULL Request through Command Line".
Conclusion
In this tutorial, you have learned the PUSH and PULL request and also the different ways through which the PUSH and PULL request is done through the command line and GitHub Desktop Applications.
There are many resources that you can learn the Git:
Getting Git Right
Git Basics
If you would like to learn more data science skills, take DataCamp's intro courses:
Reference : https://www.datacamp.com/community/tutorials/git-push-pull
Last updated