Tkinter
Jan 22, 2020
Python GUI Programming With Tkinter
Table of Contents
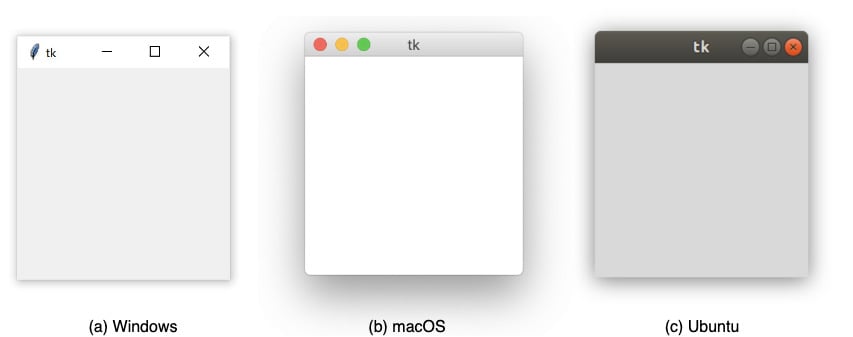
Python has a lot of GUI frameworks, but Tkinter is the only framework that’s built into the Python standard library. Tkinter has several strengths. It’s cross-platform, so the same code works on Windows, macOS, and Linux. Visual elements are rendered using native operating system elements, so applications built with Tkinter look like they belong on the platform where they’re run.
Although Tkinter is considered the de-facto Python GUI framework, it’s not without criticism. One notable criticism is that GUIs built with Tkinter look outdated. If you want a shiny, modern interface, then Tkinter may not be what you’re looking for.
However, Tkinter is lightweight and relatively painless to use compared to other frameworks. This makes it a compelling choice for building GUI applications in Python, especially for applications where a modern sheen is unnecessary, and the top priority is to build something that’s functional and cross-platform quickly.
In this tutorial, you’ll learn how to:
Get started with Tkinter with a “Hello, World!” application
Work with widgets, such as buttons and text boxes
Control your application layout with geometry managers
Make your applications interactive by associating button clicks to Python functions
Once you’ve mastered these skills by working through the exercises at the end of each section, you’ll tie everything together by building two applications. The first is a temperature converter, and the second is a text editor. It’s time to dive right in and see how to build an application with Tkinter!
Note: This tutorial is adapted from the chapter “Graphical User Interfaces” of Python Basics: A Practical Introduction to Python 3.
The book uses Python’s built-in IDLE editor to create and edit Python files and interact with the Python shell. In this tutorial, references to IDLE have been removed in favor of more general language.
The bulk of the material in this tutorial has been left unchanged, and you should have no problems running the example code from the editor and environment of your choice.
Free Bonus: 5 Thoughts On Python Mastery, a free course for Python developers that shows you the roadmap and the mindset you'll need to take your Python skills to the next level. Remove ads
Building Your First Python GUI Application With Tkinter
The foundational element of a Tkinter GUI is the window. Windows are the containers in which all other GUI elements live. These other GUI elements, such as text boxes, labels, and buttons, are known as widgets. Widgets are contained inside of windows.
First, create a window that contains a single widget. Start up a new Python shell session and follow along!
Note: The code examples in this tutorial have all been tested on Windows, macOS, and Ubuntu Linux 18.04 with Python versions 3.6, 3.7, and 3.8.
If you’ve installed Python with the official installers available for Windows and macOS from python.org, then you should have no problem running the sample code. You can safely skip the rest of this note and continue with the tutorial!
If you haven’t installed Python with the official installers, or there’s no official distribution for your system, then here are some tips for getting up and going.
Python on macOS with Homebrew:
The Python distribution for macOS available on Homebrew does not come bundled with the Tcl/Tk dependency Tkinter. The default system version is used instead. This version may be outdated and prevent you from importing the Python GUI Tkinter module. To avoid this problem, use the official macOS installer.
Ubuntu Linux 16.04:
The latest version of Python available in the Ubuntu Linux 16.04 Universe repository is 3.5. You can install the latest version with the deadsnakes PPA. Here are the commands to set up the PPA and download the latest version of Python with the correct Tcl/Tk version:
The first two commands add the deadsnakes PPA to your system’s repository list, and the last command installs Python 3.8 and the Python GUI Tkinter module.
Ubuntu Linux 18.04:
You can install the latest version of Python with the correct Tcl/Tk version from the Universe repository with the following command:
This installs Python 3.8, as well as the Python GUI Tkinter module.
Other Linux Flavors:
If you’re unable to get a working Python installation on your flavor of Linux, then you can build Python with the correct version of Tcl/Tk from the source code. For a step-by-step walkthrough of this process, check out the Python 3 Installation & Setup Guide.
With your Python shell open, the first thing you need to do is import the Python GUI Tkinter module:>>>
A window is an instance of Tkinter’s Tk class. Go ahead and create a new window and assign it to the variable window:>>>
When you execute the above code, a new window pops up on your screen. How it looks depends on your operating system:
Throughout the rest of this tutorial, you’ll see Windows screenshots.
Adding a Widget
Now that you have a window, you can add a widget. Use the tk.Label class to add some text to a window. Create a Label widget with the text "Hello, Tkinter" and assign it to a variable called greeting:>>>
The window you created earlier doesn’t change. You just created a Label widget, but you haven’t added it to the window yet. There are several ways to add widgets to a window. Right now, you can use the Label widget’s .pack() method:>>>
The window now looks like this:
When you .pack() a widget into a window, Tkinter sizes the window as small as it can while still fully encompassing the widget. Now execute the following:>>>
Nothing seems to happen, but notice that a new prompt does not appear in the shell.
window.mainloop() tells Python to run the Tkinter event loop. This method listens for events, such as button clicks or keypresses, and blocks any code that comes after it from running until the window it’s called on is closed. Go ahead and close the window you’ve created, and you’ll see a new prompt displayed in the shell.
Warning: When you work with Tkinter from a Python REPL, updates to windows are applied as each line is executed. This is not the case when a Tkinter program is executed from a Python file!
If you don’t include window.mainloop() at the end of a program in a Python file, then the Tkinter application will never run, and nothing will be displayed.
Creating a window with Tkinter only takes a couple of lines of code. But blank windows aren’t very useful! In the next section, you’ll learn about some of the widgets available in Tkinter, and how you can customize them to meet your application’s needs. Remove ads
Check Your Understanding
Expand the code blocks below to check your understanding:
Exercise: Create a Tkinter windowShow/Hide
You can expand the code block below to see a solution:
Solution: Create a Tkinter windowShow/Hide
When you’re ready, you can move on to the next section.
Working With Widgets
Widgets are the bread and butter of the Python GUI framework Tkinter. They are the elements through which users interact with your program. Each widget in Tkinter is defined by a class. Here are some of the widgets available:
Widget Class | Description |
| A widget used to display text on the screen |
| A button that can contain text and can perform an action when clicked |
| A text entry widget that allows only a single line of text |
| A text entry widget that allows multiline text entry |
| A rectangular region used to group related widgets or provide padding between widgets |
You’ll see how to work with each of these in the following sections. Note that Tkinter has many more widgets than the ones listed here. For a full list, check out Basic Widgets and More Widgets in the TkDocs tutorial. For now, take a closer look at the Label widget.
Displaying Text and Images With Label Widgets
Label WidgetsLabel widgets are used to display text or images. The text displayed by a Label widget can’t be edited by the user. It’s for display purposes only. As you saw in the example at the beginning of this tutorial, you can create a Label widget by instantiating the Label class and passing a string to the text parameter:
Label widgets display text with the default system text color and the default system text background color. These are typically black and white, respectively, but you may see different colors if you have changed these settings in your operating system.
You can control Label text and background colors using the foreground and background parameters:
There are numerous valid color names, including:
"red""orange""yellow""green""blue""purple"
Many of the HTML color names work with Tkinter. A chart with most of the valid color names is available here. For a full reference, including macOS and Windows-specific system colors that are controlled by the current system theme, check out the colors manual page.
You can also specify a color using hexadecimal RGB values:
This sets the label background to a nice, light blue color. Hexadecimal RGB values are more cryptic than named colors, but they’re also more flexible. Fortunately, there are tools available that make getting hexadecimal color codes relatively painless.
If you don’t feel like typing out foreground and background all the time, then you can use the shorthand fg and bg parameters to set the foreground and background colors:
You can also control the width and height of a label with the width and height parameters:
Here’s what this label looks like in a window:
It may seem strange that the label in the window isn’t square even though the width and height are both set to 10. This is because the width and height are measured in text units. One horizontal text unit is determined by the width of the character "0", or the number zero, in the default system font. Similarly, one vertical text unit is determined by the height of the character "0".
Note: Tkinter uses text units for width and height measurements, instead of something like inches, centimeters, or pixels, to ensure consistent behavior of the application across platforms.
Measuring units by the width of a character means that the size of a widget is relative to the default font on a user’s machine. This ensures the text fits properly in labels and buttons, no matter where the application is running.
Labels are great for displaying some text, but they don’t help you get input from a user. The next three widgets that you’ll look at are all used to get user input. Remove ads
Displaying Clickable Buttons With Button Widgets
Button WidgetsButton widgets are used to display clickable buttons. They can be configured to call a function whenever they’re clicked. You’ll cover how to call functions from button clicks in the next section. For now, take a look at how to create and style a Button.
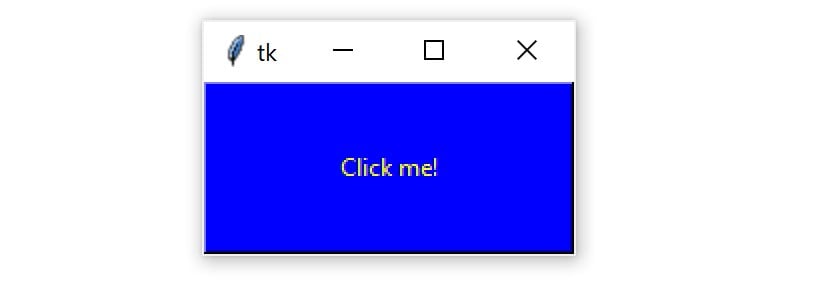
There are many similarities between Button and Label widgets. In many ways, a Button is just a Label that you can click! The same keyword arguments you use to create and style a Label will work with Button widgets. For example, the following code creates a Button with a blue background and yellow text. It also sets the width and height to 25 and 5 text units, respectively:
Here’s what the button looks like in a window:
Pretty nifty! The next two widgets you’ll see are used to collect text input from a user.
Getting User Input With Entry Widgets
Entry WidgetsWhen you need to get a little bit of text from a user, like a name or an email address, use an Entry widget. They display a small text box that the user can type some text into. Creating and styling an Entry widget works pretty much exactly like Label and Button widgets. For example, the following code creates a widget with a blue background, some yellow text, and a width of 50 text units:
The interesting bit about Entry widgets isn’t how to style them, though. It’s how to use them to get input from a user. There are three main operations that you can perform with Entry widgets:
Retrieving text with
.get()Deleting text with
.delete()Inserting text with
.insert()
The best way to get an understanding of Entry widgets is to create one and interact with it. Open up a Python shell and follow along with the examples in this section. First, import tkinter and create a new window:>>>
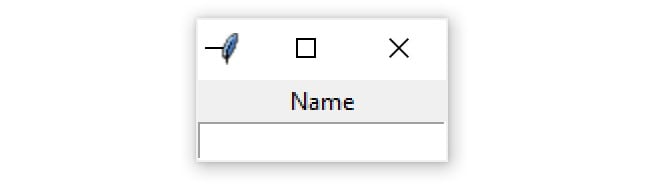
Now create a Label and an Entry widget:>>>
The Label describes what sort of text should go in the Entry widget. It doesn’t enforce any sort of requirements on the Entry, but it tells the user what your program expects them to put there. You need to .pack() the widgets into the window so that they’re visible:>>>
Here’s what that looks like:
Notice that Tkinter automatically centers the Label above the Entry widget in the window. This is a feature of .pack(), which you’ll learn more about in later sections.
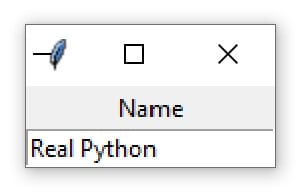
Click inside the Entry widget with your mouse and type "Real Python":
Now you’ve got some text entered into the Entry widget, but that text hasn’t been sent to your program yet. You can use .get() to retrieve the text and assign it to a variable called name:>>>
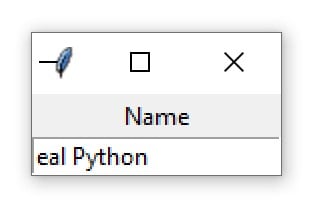
You can .delete() text as well. This method takes an integer argument that tells Python which character to remove. For example, the code block below shows how .delete(0) deletes the first character from the Entry:>>>
The text remaining in the widget is now "eal Python":
Note that, just like Python string objects, text in an Entry widget is indexed starting with 0.
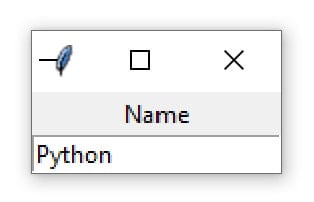
If you need to remove several characters from an Entry, then pass a second integer argument to .delete() indicating the index of the character where deletion should stop. For example, the following code deletes the first four letters in the Entry:>>>
The remaining text now reads "Python":
Entry.delete() works just like string slicing. The first argument determines the starting index, and the deletion continues up to but not including the index passed as the second argument. Use the special constant tk.END for the second argument of .delete() to remove all text in an Entry:>>>
You’ll now see a blank text box:
On the opposite end of the spectrum, you can also .insert() text into an Entry widget:>>>
The window now looks like this:
The first argument tells .insert() where to insert the text. If there is no text in the Entry, then the new text will always be inserted at the beginning of the widget, no matter what value you pass as the first argument. For example, calling .insert() with 100 as the first argument instead of 0, as you did above, would have generated the same output.
If an Entry already contains some text, then .insert() will insert the new text at the specified position and shift all existing text to the right:>>>
The widget text now reads "Real Python":
Entry widgets are great for capturing small amounts of text from a user, but because they’re only displayed on a single line, they’re not ideal for gathering large amounts of text. That’s where Text widgets come in! Remove ads
Getting Multiline User Input With Text Widgets
Text WidgetsText widgets are used for entering text, just like Entry widgets. The difference is that Text widgets may contain multiple lines of text. With a Text widget, a user can input a whole paragraph or even several pages of text! Just like Entry widgets, there are three main operations you can perform with Text widgets:
Retrieve text with
.get()Delete text with
.delete()Insert text with
.insert()
Although the method names are the same as the Entry methods, they work a bit differently. It’s time to get your hands dirty by creating a Text widget and seeing what all it can do.
Note: Do you still have the window from the previous section open?
If so, then you can close it by executing the following:>>>
You can also close it manually by clicking the Close button.
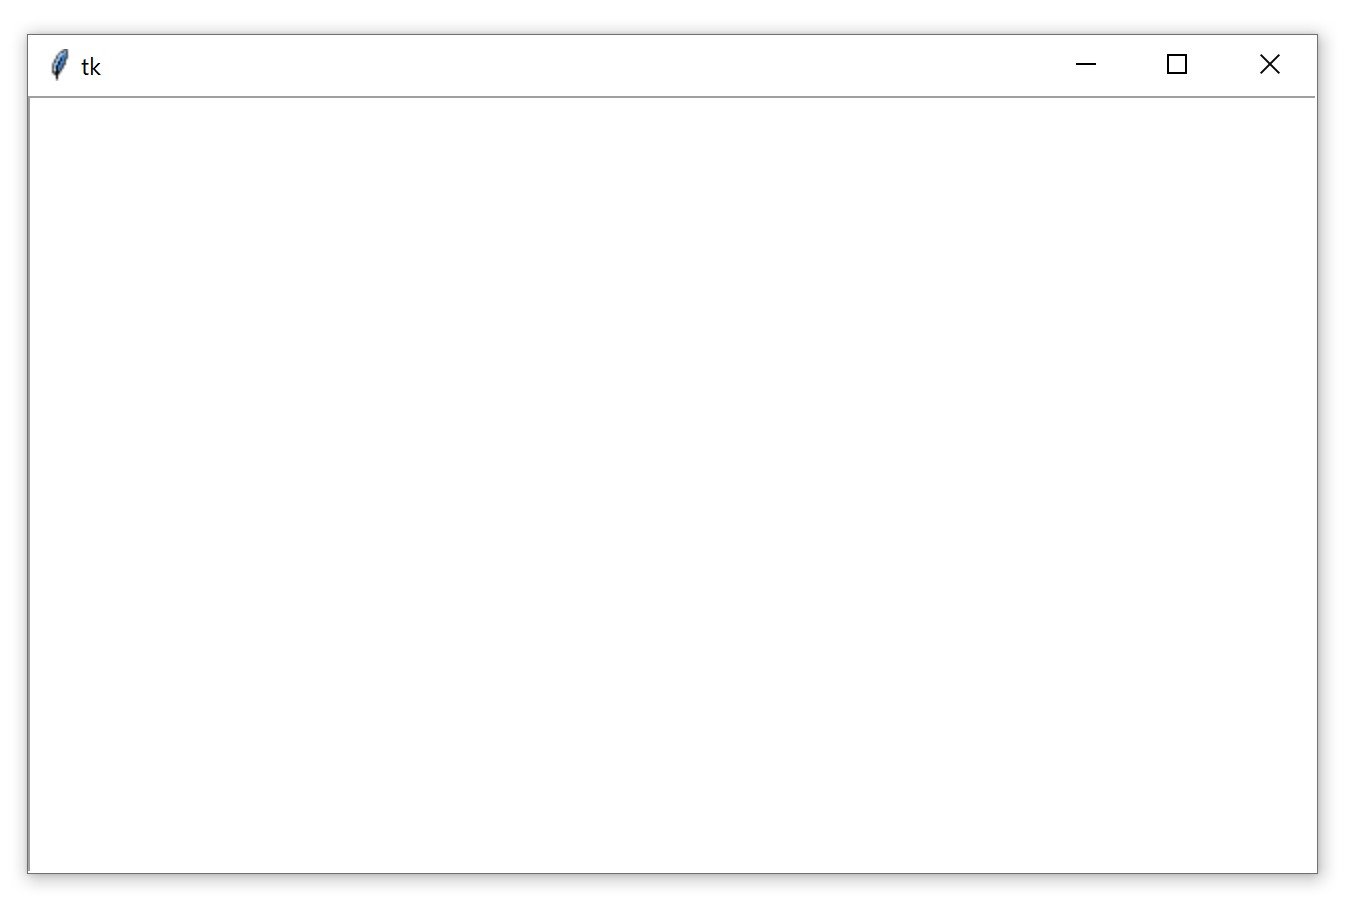
In your Python shell, create a new blank window and .pack() a Text() widget into it:>>>
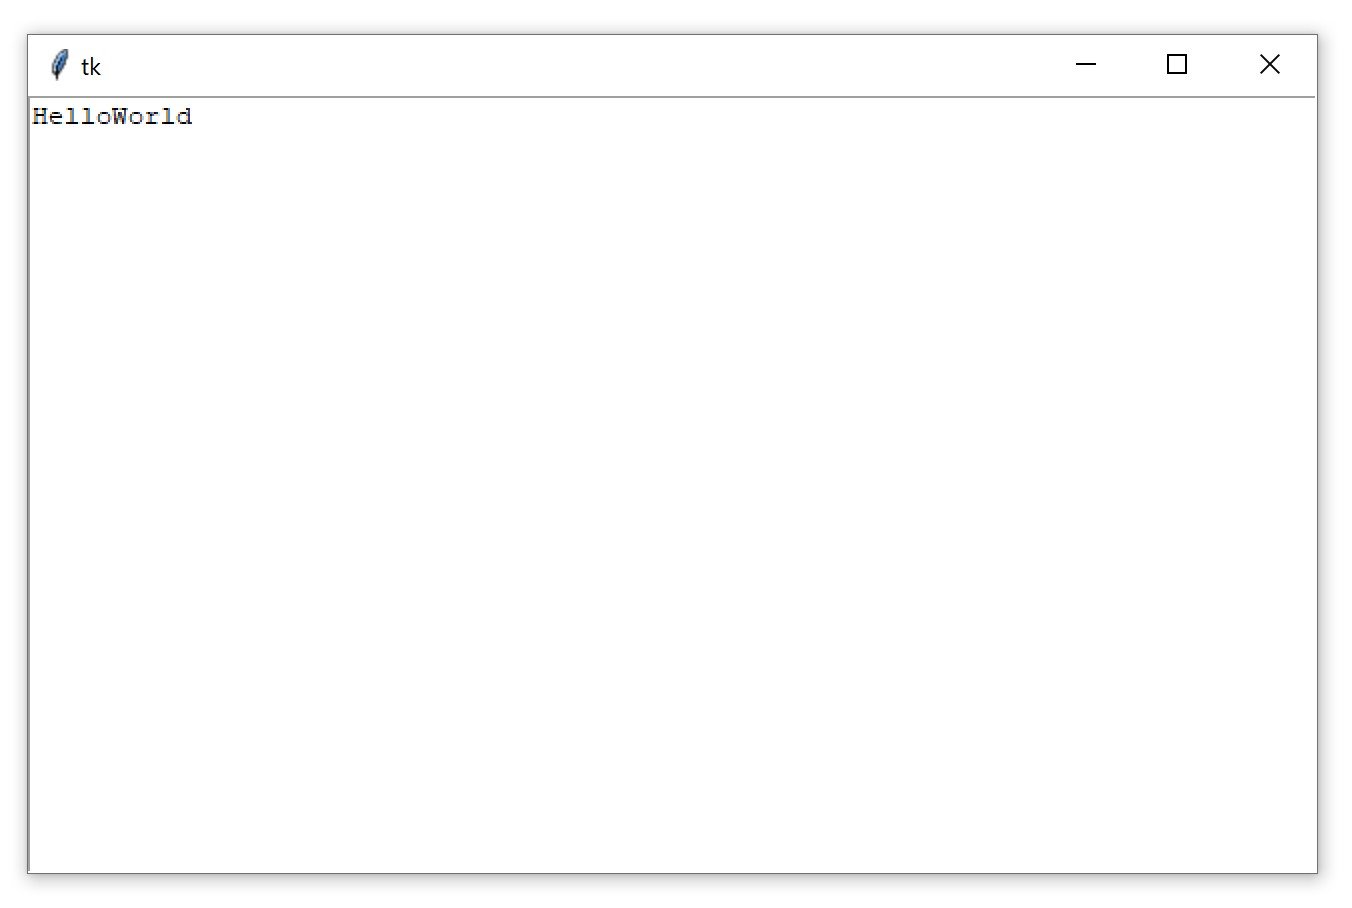
Text boxes are much larger than Entry widgets by default. Here’s what the window created above looks like:
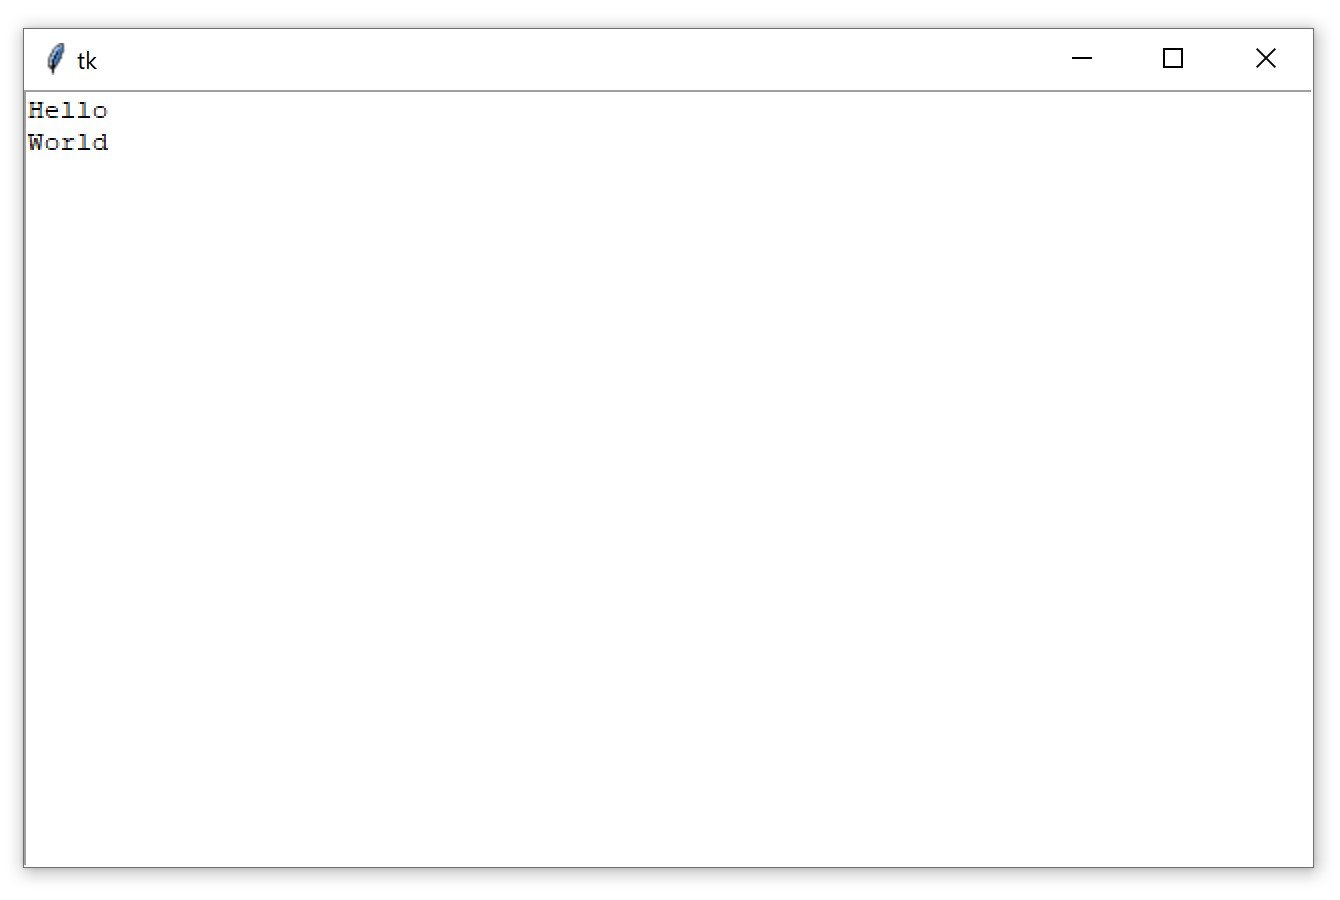
Click anywhere inside the window to activate the text box. Type in the word "Hello". Then press Enter and type "World" on the second line. The window should now look like this:
Just like Entry widgets, you can retrieve the text from a Text widget using .get(). However, calling .get() with no arguments doesn’t return the full text in the text box like it does for Entry widgets. It raises an exception:>>>
Text.get() required at least one argument. Calling .get() with a single index returns a single character. To retrieve several characters, you need to pass a start index and an end index. Indices in Text widgets work differently than Entry widgets. Since Text widgets can have several lines of text, an index must contain two pieces of information:
The line number of a character
The position of a character on that line
Line numbers start with 1, and character positions start with 0. To make an index, you create a string of the form "<line>.<char>", replacing <line> with the line number and <char> with the character number. For example, "1.0" represents the first character on the first line, and "2.3" represents the fourth character on the second line.
Use the index "1.0" to get the first letter from the text box you created earlier:>>>
There are five letters in the word "Hello", and the character number of o is 4, since character numbers start from 0, and the word "Hello" starts at the first position in the text box. Just like Python string slices, in order to get the entire word "Hello" from the text box, the end index must be one more than the index of the last character to be read.
So, to get the word "Hello" from the text box, use "1.0" for the first index and "1.5" for the second index:>>>
To get the word "World" on the second line of the text box, change the line numbers in each index to 2:>>>
To get all of the text in a text box, set the starting index in "1.0" and use the special tk.END constant for the second index:>>>
Notice that text returned by .get() includes any newline characters. You can also see from this example that every line in a Text widget has a newline character at the end, including the last line of text in the text box.
.delete() is used to delete characters from a text box. It work just like .delete() for Entry widgets. There are two ways to use .delete():
With a single argument
With two arguments
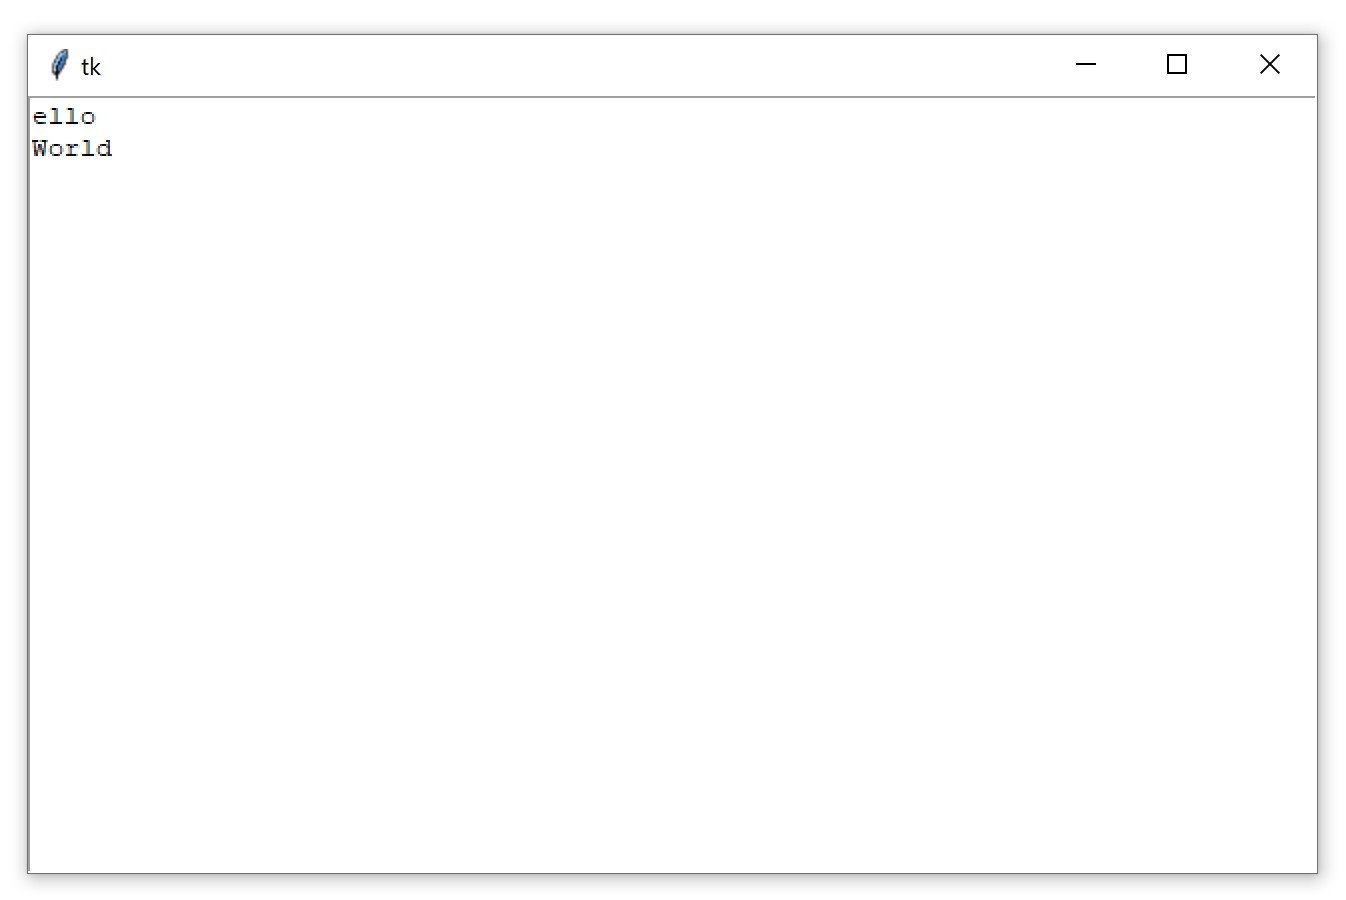
Using the single-argument version, you pass to .delete() the index of a single character to be deleted. For example, the following deletes the first character H from the text box:>>>
The first line of text in the window now reads "ello":
With the two-argument version, you pass two indices to delete a range of characters starting at the first index and up to, but not including, the second index.
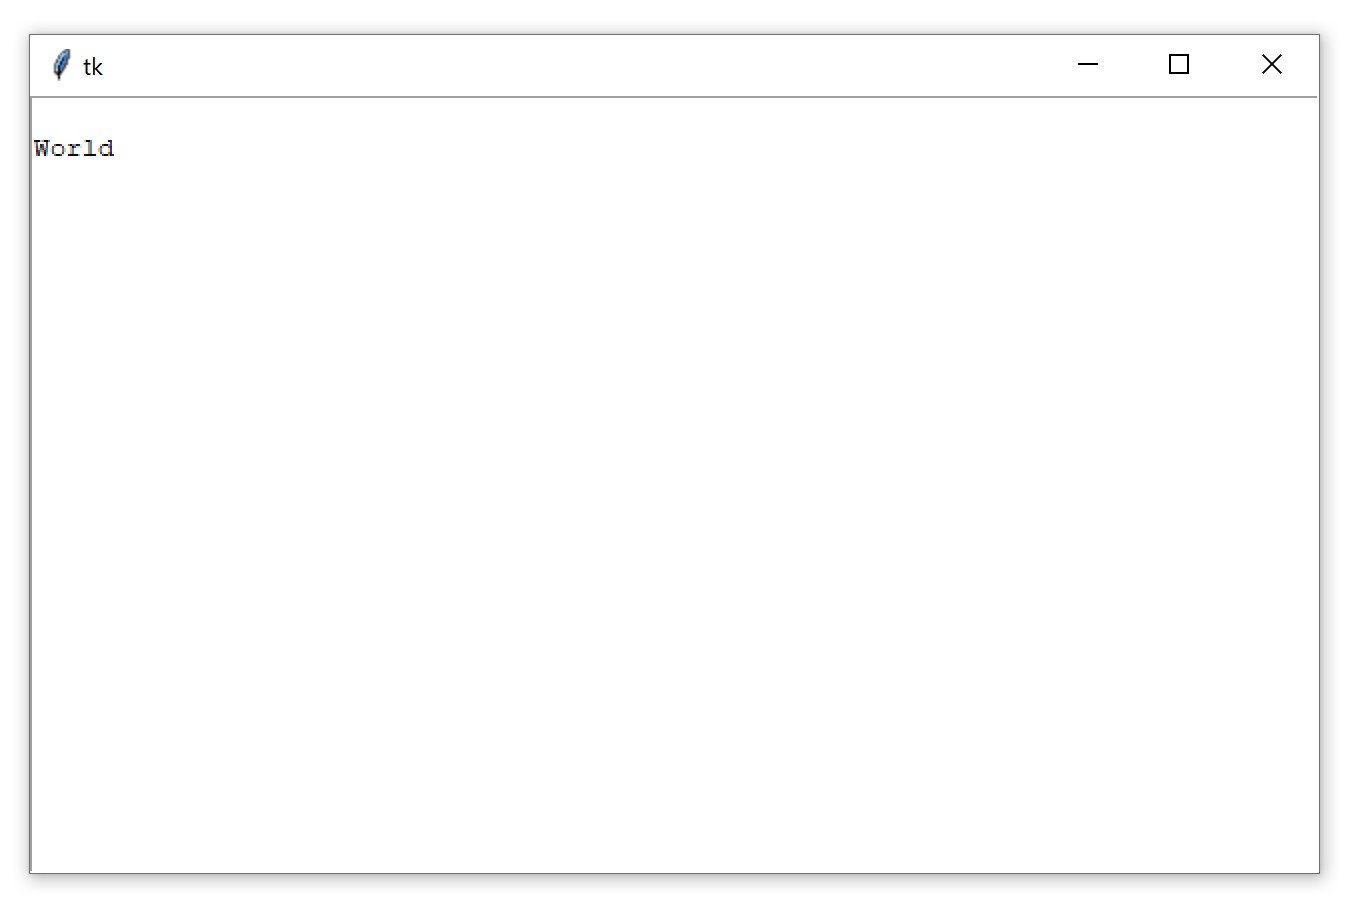
For example, to delete the remaining "ello" on the first line of the text box, use the indices "1.0" and "1.4":>>>
Notice that the text is gone from the first line. This leaves a blank line followed the word World on the second line:
Even though you can’t see it, there’s still a character on the first line. It’s a newline character! You can verify this using .get():>>>
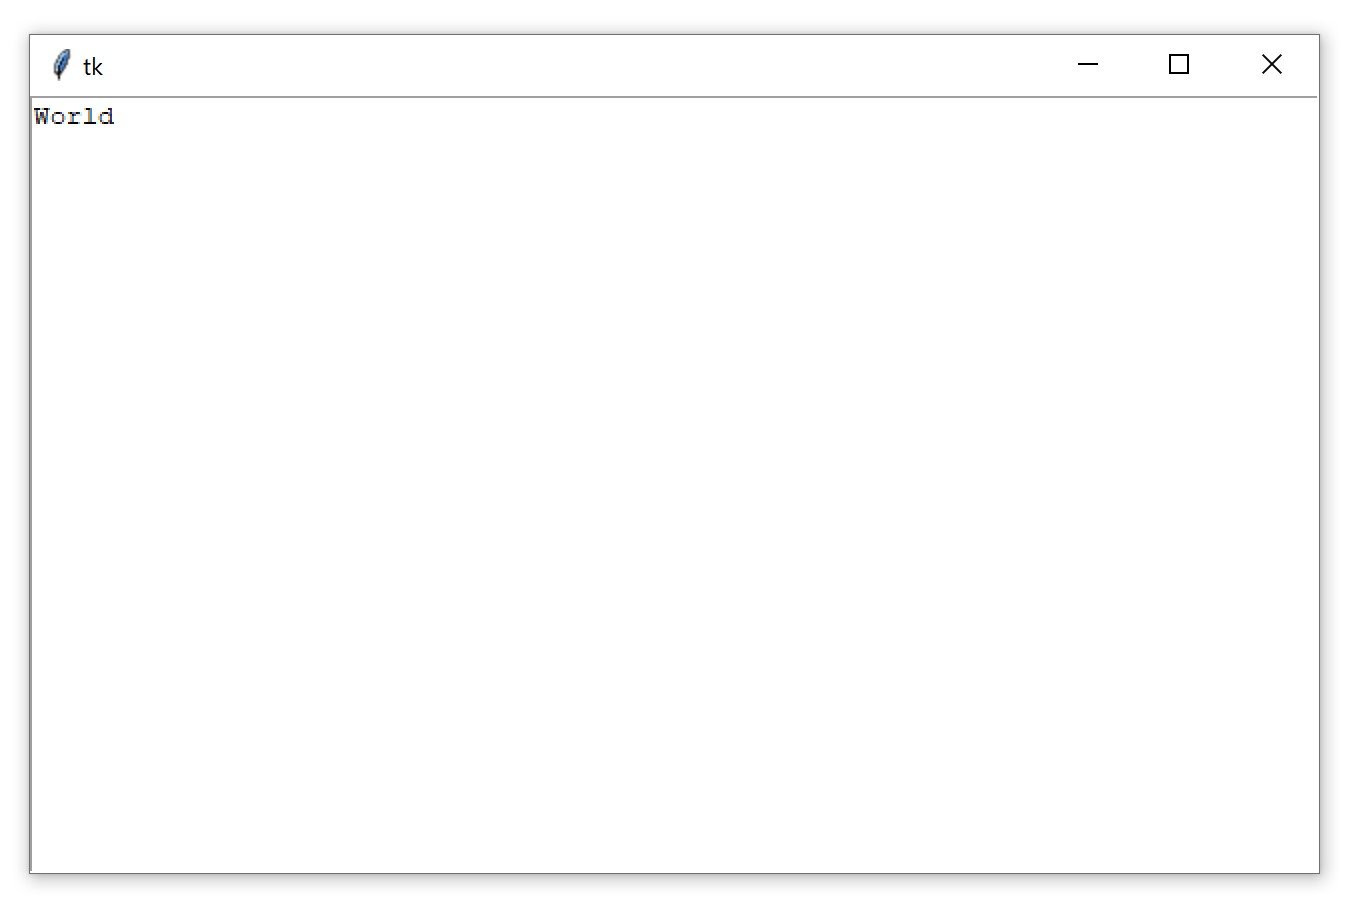
If you delete that character, then the rest of the contents of the text box will shift up a line:>>>
Now, "World" is on the first line of the text box:
Try to clear out the rest of the text in the text box. Set "1.0" as the start index and use tk.END for the second index:>>>
The text box is now empty:
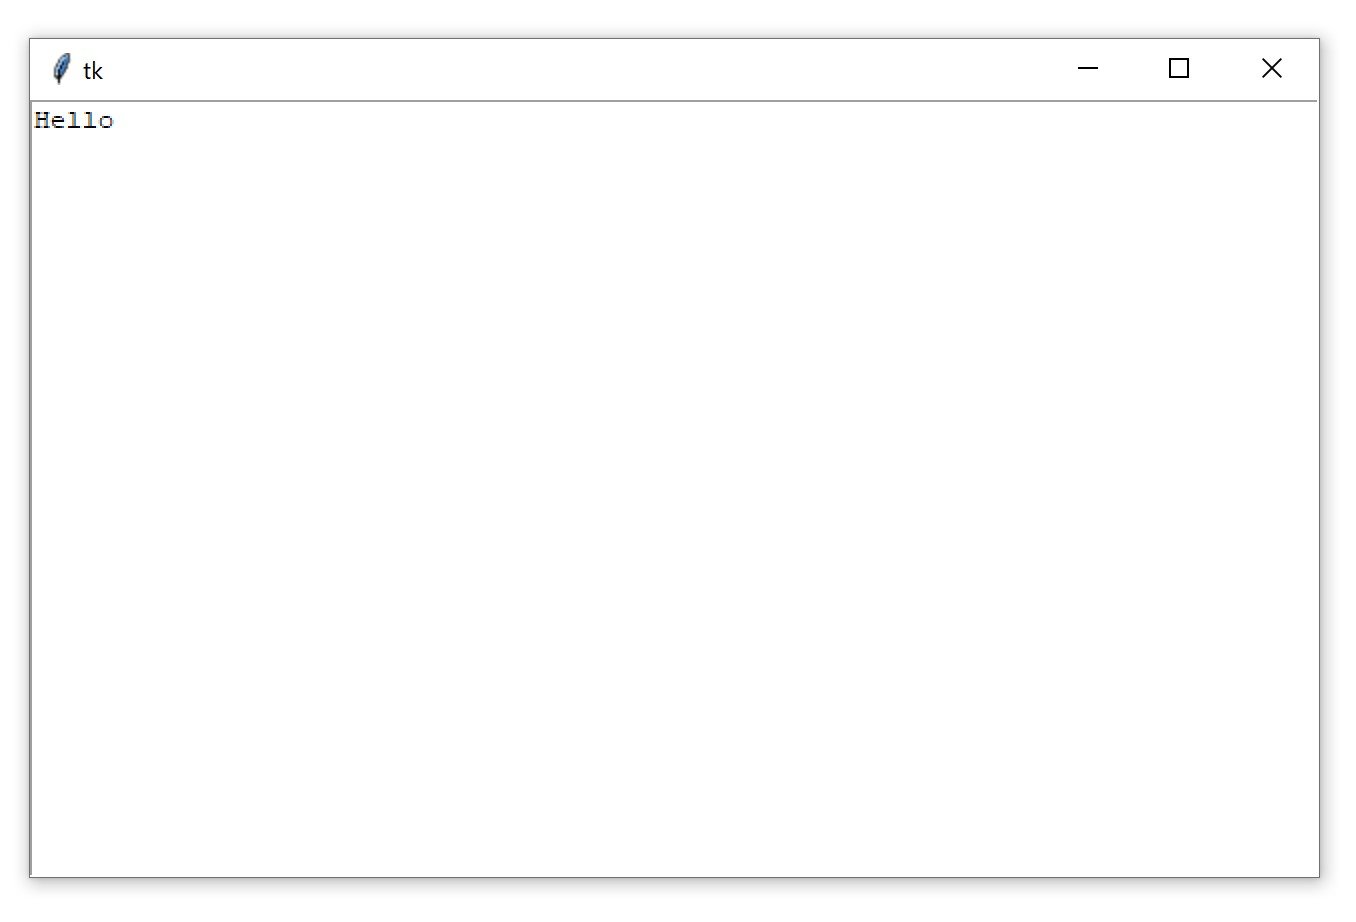
You can insert text into a text box using .insert():>>>
This inserts the word "Hello" at the beginning of the text box, using the same "<line>.<column>" format used by .get() to specify the insertion position:
Check out what happens if you try to insert the word "World" on the second line:>>>
Instead of inserting the text on the second line, the text is inserted at the end of the first line:
If you want to insert text onto a new line, then you need to insert a newline character manually into the string being inserted:>>>
Now "World" is on the second line of the text box:
.insert() will do one of two things:
Insert text at the specified position if there’s already text at or after that position.
Append text to the specified line if the character number is greater than the index of the last character in the text box.
It’s usually impractical to try and keep track of what the index of the last character is. The best way to insert text at the end of a Text widget is to pass tk.END to the first parameter of .insert():
Don’t forget to include the newline character (\n) at the beginning of the text if you want to put it on a new line:
Label, Button, Entry, and Text widgets are just a few of the widgets available in Tkinter. There are several others, including widgets for checkboxes, radio buttons, scroll bars, and progress bars. For more information on all of the available widgets, see the Additional Widgets list in the Additional Resources section. Remove ads
Assigning Widgets to Frames With Frame Widgets
Frame WidgetsIn this tutorial, you’re going to work with only five widgets. These are the four you’ve seen so far plus the Frame widget. Frame widgets are important for organizing the layout of your widgets in an application.
Before you get into the details about laying out the visual presentation of your widgets, take a closer look at how Frame widgets work, and how you can assign other widgets to them. The following script creates a blank Frame widget and assigns it to the main application window:
frame.pack() packs the frame into the window so that the window sizes itself as small as possible to encompass the frame. When you run the above script, you get some seriously uninteresting output:
An empty Frame widget is practically invisible. Frames are best thought of as containers for other widgets. You can assign a widget to a frame by setting the widget’s master attribute:
To get a feel for how this works, write a script that creates two Frame widgets called frame_a and frame_b. In this script, frame_a contains a label with the text "I'm in Frame A", and frame_b contains the label "I'm in Frame B". Here’s one way to do this:
Note that frame_a is packed into the window before frame_b. The window that opens shows the label in frame_a above the label in frame_b:
Now see what happens when you swap the order of frame_a.pack() and frame_b.pack():
The output looks like this:
Now label_b is on top. Since label_b is assigned to frame_b, it moves to wherever frame_b is positioned.
All four of the widget types you’ve learned about—Label, Button, Entry, and Text—have a master attribute that’s set when you instantiate them. That way, you can control which Frame a widget is assigned to. Frame widgets are great for organizing other widgets in a logical manner. Related widgets can be assigned to the same frame so that, if the frame is ever moved in the window, then the related widgets stay together.
In addition to grouping your widgets logically, Frame widgets can add a little flare to the visual presentation of your application. Read on to see how to create various borders for Frame widgets.
Adjusting Frame Appearance With Reliefs
Frame widgets can be configured with a relief attribute that creates a border around the frame. You can set relief to be any of the following values:
tk.FLAT: Has no border effect (the default value).tk.SUNKEN: Creates a sunken effect.tk.RAISED: Creates a raised effect.tk.GROOVE: Creates a grooved border effect.tk.RIDGE: Creates a ridged effect.
To apply the border effect, you must set the borderwidth attribute to a value greater than 1. This attribute adjusts the width of the border in pixels. The best way to get a feel for what each effect looks like is to see them for yourself. Here’s a script that packs five Frame widgets into a window, each with a different value for the relief argument:
Here’s a breakdown of this script:
Lines 3 to 9 create a dictionary whose keys are the names of the different relief effects available in Tkinter. The values are the corresponding Tkinter objects. This dictionary is assigned to the
border_effectsvariable.Line 13 starts a
forloop to loop over each item in theborder_effectsdictionary.Line 14 creates a new
Framewidget and assigns it to thewindowobject. Thereliefattribute is set to the corresponding relief in theborder_effectsdictionary, and theborderattribute is set to5so that the effect is visible.Line 15 packs the
Frameinto the window using.pack(). Thesidekeyword argument tells Tkinter in which direction to pack theframeobjects. You’ll see more about how this works in the next section.Lines 16 and 17 create a
Labelwidget to display the name of the relief and pack it into theframeobject you just created.
The window produced by the above script looks like this:
In this image, you can see the following effects:
tk.FLATcreates a frame that appears to be flat.tk.SUNKENadds a border that gives the frame the appearance of being sunken into the window.tk.RAISEDgives the frame a border that makes it appear to protrude from the screen.tk.GROOVEadds a border that appears as a sunken groove around an otherwise flat frame.tk.RIDGEgives the appearance of a raised lip around the edge of the frame.
These effects give your Python GUI Tkinter application a bit of visual appeal. Remove ads
Understanding Widget Naming Conventions
When you create a widget, you can give it any name you like, as long as it’s a valid Python identifier. It’s usually a good idea to include the name of the widget class in the variable name you assign to the widget instance. For example, if a Label widget is used to display a user’s name, then you might name the widget label_user_name. An Entry widget used to collect a user’s age might be called entry_age.
When you include the widget class name in the variable name, you help yourself (and anyone else that needs to read your code) to understand what type of widget the variable name refers to. However, using the full name of the widget class can lead to long variable names, so you may want to adopt a shorthand for referring to each widget type. For the rest of this tutorial, you’ll use the following shorthand prefixes to name widgets:
Widget Class | Variable Name Prefix | Example |
|
|
|
|
|
|
|
|
|
|
|
|
|
|
|
In this section, you learned how to create a window, use widgets, and work with frames. At this point, you can make some plain windows that display messages, but you’ve yet to create a full-blown application. In the next section, you’ll learn how to control the layout of your applications using Tkinter’s powerful geometry managers.
Check Your Understanding
Expand the code block below for an exercise to check your understanding:
Exercise: Create an Entry widget and insert some textShow/Hide
You can expand the code block below to see a solution:
Solution: Create an Entry widget and insert some textShow/Hide
When you’re ready, you can move on to the next section.
Controlling Layout With Geometry Managers
Up until now, you’ve been adding widgets to windows and Frame widgets using .pack(), but you haven’t learned what exactly this method does. Let’s clear things up! Application layout in Tkinter is controlled with geometry managers. While .pack() is an example of a geometry manager, it isn’t the only one. Tkinter has two others:
.place().grid()
Each window and Frame in your application can use only one geometry manager. However, different frames can use different geometry managers, even if they’re assigned to a frame or window using another geometry manager. Start by taking a closer look at .pack().
The .pack() Geometry Manager
.pack() Geometry Manager.pack() uses a packing algorithm to place widgets in a Frame or window in a specified order. For a given widget, the packing algorithm has two primary steps:
Compute a rectangular area called a parcel that’s just tall (or wide) enough to hold the widget and fills the remaining width (or height) in the window with blank space.
Center the widget in the parcel unless a different location is specified.
.pack() is powerful, but it can be difficult to visualize. The best way to get a feel for .pack() is to look at some examples. See what happens when you .pack() three Label widgets into a Frame:
.pack() places each Frame below the previous one by default, in the order that they’re assigned to the window:
Each Frame is placed at the top-most available position. The red Frame is placed at the top of the window. Then the yellow Frame is placed just below the red one and the blue Frame just below the yellow one.
There are three invisible parcels containing each of the three Frame widgets. Each parcel is as wide as the window and as tall as the Frame that it contains. Since no anchor point was specified when .pack() was called for each Frame, they’re all centered inside of their parcels. That’s why each Frame is centered in the window.
.pack() accepts some keyword arguments for more precisely configuring widget placement. For example, you can set the fill keyword argument to specify in which direction the frames should fill. The options are tk.X to fill in the horizontal direction, tk.Y to fill vertically, and tk.BOTH to fill in both directions. Here’s how you would stack the three frames so that each one fills the whole window horizontally:
Notice that the width is not set on any of the Frame widgets. width is no longer necessary because each frame sets .pack() to fill horizontally, overriding any width you may set.
The window produced by this script looks like this:
One of the nice things about filling the window with .pack() is that the fill is responsive to window resizing. Try widening the window generated by the previous script to see how this works. As you widen the window, the width of the three Frame widgets grow to fill the window:
Notice, though, that the Frame widgets don’t expand in the vertical direction.
The side keyword argument of .pack() specifies on which side of the window the widget should be placed. These are the available options:
tk.TOPtk.BOTTOMtk.LEFTtk.RIGHT
If you don’t set side, then .pack() will automatically use tk.TOP and place new widgets at the top of the window, or at the top-most portion of the window that isn’t already occupied by a widget. For example, the following script places three frames side-by-side from left to right and expands each frame to fill the window vertically:
This time, you have to specify the height keyword argument on at least one of the frames to force the window to have some height.
The resulting window looks like this:
Just like when you set fill=tk.X to make the frames responsive when you resized the window horizontally, you can set fill=tk.Y to make the frames responsive when you resize the window vertically:
To make the layout truly responsive, you can set an initial size for your frames using the width and height attributes. Then, set the fill keyword argument of .pack() to tk.BOTH and set the expand keyword argument to True:
When you run the above script, you’ll see a window that initially looks the same as the one you generated in the previous example. The difference is that now you can resize the window however you want and the frames will expand and fill the window responsively:
Pretty cool! Remove ads
The .place() Geometry Manager
.place() Geometry ManagerYou can use .place() to control the precise location that a widget should occupy in a window or Frame. You must provide two keyword arguments, x and y, which specify the x- and y-coordinates for the top-left corner of the widget. Both x and y are measured in pixels, not text units.
Keep in mind that the origin (where x and y are both 0) is the top-left corner of the Frame or window. So, you can think of the y argument of .place() as the number of pixels from the top of the window, and the x argument as the number of pixels from the left of the window.
Here’s an example of how the .place() geometry manager works:
Here’s how this code works:
Lines 5 and 6 create a new
Framewidget calledframe1, one that’s150pixels wide and150pixels tall, and pack it into the window with.pack().Lines 8 and 9 create a new
Labelcalledlabel1with a yellow background and place it inframe1at position (0, 0).Lines 11 and 12 create a second
Labelcalledlabel2with a red background and place it inframe1at position (75, 75).
Here’s the window the code produces:
.place() is not used often. It has two main drawbacks:
Layout can be difficult to manage with
.place(). This is especially true if your application has lots of widgets.Layouts created with
.place()are not responsive. They don’t change as the window is resized.
One of the main challenges of cross-platform GUI development is making layouts that look good no matter which platform they are viewed on, and .place() is a poor choice for making responsive and cross-platform layouts.
That’s not to say .place() should never be used! In some cases, it might be just what you need. For example, if you’re creating a GUI interface for a map, then .place() might be the perfect choice to ensure widgets are placed at the correct distance from each other on the map.
.pack() is usually a better choice than .place(), but even .pack() has some downsides. The placement of widgets depends on the order in which .pack() is called, so it can be difficult to modify existing applications without fully understanding the code controlling the layout. The .grid() geometry manager solves a lot of these issues, as you’ll see in the next section.
The .grid() Geometry Manager
.grid() Geometry ManagerThe geometry manager you’ll likely use most often is .grid(), which provides all the power of .pack() in a format that’s easier to understand and maintain.
.grid() works by splitting a window or Frame into rows and columns. You specify the location of a widget by calling .grid() and passing the row and column indices to the row and column keyword arguments, respectively. Both row and column indices start at 0, so a row index of 1 and a column index of 2 tells .grid() to place a widget in the third column of the second row.
The following script creates a 3 × 3 grid of frames with Label widgets packed into them:
Here’s what the resulting window looks like:
Two geometry managers are being used in this example. Each Frame is attached to the window with the .grid() geometry manager:
Each label is attached to its master Frame with .pack():
The important thing to realize here is that even though .grid() is called on each Frame object, the geometry manager applies to the window object. Similarly, the layout of each frame is controlled with the .pack() geometry manager.
The frames in the previous example are placed tightly next to one another. To add some space around each Frame, you can set the padding of each cell in the grid. Padding is just some blank space that surrounds a widget and separates it visually from its contents.
The two types of padding are external and internal padding. External padding adds some space around the outside of a grid cell. It’s controlled with two keyword arguments to .grid():
padxadds padding in the horizontal direction.padyadds padding in the vertical direction.
Both padx and pady are measured in pixels, not text units, so setting both of them to the same value will create the same amount of padding in both directions. Try to add some padding around the outside of the frames in the previous example:
Here’s the resulting window:
.pack() also has padx and pady parameters. The following code is nearly identical to the previous code, except that you add 5 pixels of additional padding around each Label in both the x and y directions:
The extra padding around the Label widgets gives each cell in the grid a little bit of breathing room between the Frame border and the text in the Label:
That looks pretty nice! But if you try and expand the window in any direction, then you’ll notice that the layout isn’t very responsive:
The whole grid stays at the top-left corner as the window expands.
You can adjust how the rows and columns of the grid grow as the window is resized using .columnconfigure() and .rowconfigure() on the window object. Remember, the grid is attached to window, even though you’re calling .grid() on each Frame widget. Both .columnconfigure() and .rowconfigure() take three essential arguments:
The index of the grid column or row that you want to configure (or a list of indices to configure multiple rows or columns at the same time)
A keyword argument called
weightthat determines how the column or row should respond to window resizing, relative to the other columns and rowsA keyword argument called
minsizethat sets the minimum size of the row height or column width in pixels
weight is set to 0 by default, which means that the column or row doesn’t expand as the window resizes. If every column and row is given a weight of 1, then they all grow at the same rate. If one column has a weight of 1 and another a weight of 2, then the second column expands at twice the rate of the first. Adjust the previous script to better handle window resizing:
.columnconfigure() and .rowconfigure() are placed in the body of the outer for loop. (You could explicitly configure each column and row outside of the for loop, but that would require writing an additional six lines of code.)
On each iteration of the loop, the i-th column and row are configured to have a weight of 1. This ensures that each row and column expands at the same rate whenever the window is resized. The minsize argument is set to 75 for each column and 50 for each row. This makes sure the Label widget always displays its text without chopping off any characters, even if the window size is extremely small.
The result is a grid layout that expands and contracts smoothly as the window is resized:
Try it yourself to get a feel for how it works! Play around with the weight and minsize parameters to see how they affect the grid.
By default, widgets are centered in their grid cells. For example, the following code creates two Label widgets and places them in a grid with one column and two rows:
Each grid cell is 250 pixels wide and 100 pixels tall. The labels are placed in the center of each cell, as you can see in the following figure:
You can change the location of each label inside of the grid cell using the sticky parameter. sticky accepts a string containing one or more of the following letters:
"n"or"N"to align to the top-center part of the cell"e"or"E"to align to the right-center side of the cell"s"or"S"to align to the bottom-center part of the cell"w"or"W"to align to the left-center side of the cell
The letters "n", "s", "e", and "w" come from the cardinal directions north, south, east, and west. Setting sticky to "n" on both Labels in the previous code positions each Label at the top-center of its grid cell:
Here’s the output:
You can combine multiple letters in a single string to position each Label in the corner of its grid cell:
In this example, the sticky parameter of label1 is set to "ne", which places the label at the top-right corner of its grid cell. label2 is positioned in the bottom-left corner by passing "sw" to sticky. Here’s what that looks like in the window:
When a widget is positioned with sticky, the size of the widget itself is just big enough to contain any text and other contents inside of it. It won’t fill the entire grid cell. In order to fill the grid, you can specify "ns" to force the widget to fill the cell in the vertical direction, or "ew" to fill the cell in the horizontal direction. To fill the entire cell, set sticky to "nsew". The following example illustrates each of these options:
Here’s what the output looks like:
What the above example illustrates is that the .grid() geometry manager’s sticky parameter can be used to achieve the same effects as the .pack() geometry manager’s fill parameter. The correspondence between the sticky and fill parameters is summarized in the following table:
|
|
|
|
|
|
|
|
.grid() is a powerful geometry manager. It’s often easier to understand than .pack() and is much more flexible than .place(). When you’re creating new Tkinter applications, you should consider using .grid() as your primary geometry manager.
Note: .grid() offers much more flexibility than you’ve seen here. For example, you can configure cells to span multiple rows and columns. For more information, check out the Grid Geometry Manager section of the TkDocs tutorial.
Now that you’ve got the fundamentals of geometry managers down for the Python GUI framework Tkinter, the next step is to assign actions to buttons to bring your applications to life. Remove ads
Check Your Understanding
Expand the code block below for an exercise to check your understanding:
Exercise: Create an address entry formShow/Hide
You can expand the code block below to see a solution:
Solution: Create an address entry formShow/Hide
When you’re ready, you can move on to the next section.
Making Your Applications Interactive
By now, you have a pretty good idea of how to create a window with Tkinter, add some widgets, and control the application layout. That’s great, but applications shouldn’t just look good—they actually need to do something! In this section, you’ll learn how to bring your applications to life by performing actions whenever certain events occur.
Using Events and Event Handlers
When you create a Tkinter application, you must call window.mainloop() to start the event loop. During the event loop, your application checks if an event has occurred. If so, then some code can be executed in response.
The event loop is provided for you with Tkinter, so you don’t have to write any code that checks for events yourself. However, you do have to write the code that will be executed in response to an event. In Tkinter, you write functions called event handlers for the events that you use in your application.
Note: An event is any action that occurs during the event loop that might trigger some behavior in the application, such as when a key or mouse button is pressed.
When an event occurs, an event object is emitted, which means that an instance of a class representing the event is instantiated. You don’t need to worry about creating these classes yourself. Tkinter will create instances of event classes for you automatically.
You’ll write your own event loop in order to understand better how Tkinter’s event loop works. That way, you can see how Tkinter’s event loop fits into your application, and which parts you need to write yourself.
Assume there’s a list called events_list that contains event objects. A new event object is automatically appended to events_list every time an event occurs in your program. (You don’t need to implement this updating mechanism. It just automatically happens for you in this conceptual example.) Using an infinite loop, you can continually check if there are any event objects in events_list:
Right now, the event loop you’ve created doesn’t do anything with event. Let’s change that. Suppose your application needs to respond to keypresses. You need to check that event was generated by a user pressing a key on their keyboard, and, if so, pass event to an event handler function for key presses.
Assume that event has a .type attribute set to the string "keypress" if the event is a keypress event object, and a .char attribute containing the character of the key that was pressed. Create a new function handle_keypress() and update your event loop code:
When you call window.mainloop(), something like the above loop is run for you. This method takes care of two parts of the loop for you:
It maintains a list of events that have occurred.
It runs an event handler any time a new event is added to that list.
Update your event loop to use window.mainloop() instead of your own event loop:
.mainloop() takes care of a lot for you, but there’s something missing from the above code. How does Tkinter know when to use handle_keypress()? Tkinter widgets have a method called .bind() for just this purpose. Remove ads
Using .bind()
.bind()To call an event handler whenever an event occurs on a widget, use .bind(). The event handler is said to be bound to the event because it’s called every time the event occurs. You’ll continue with the keypress example from the previous section and use .bind() to bind handle_keypress() to the keypress event:
Here, the handle_keypress() event handler is bound to a "<Key>" event using window.bind(). Whenever a key is pressed while the application is running, your program will print the character of the key pressed.
Note: The output of the above program is not printed in the Tkinter application window. It is printed to stdout.
If you run the program in IDLE, you’ll see the output in the interactive window. If you run the program from a terminal, you should see the output in your terminal.
.bind() always takes at least two arguments:
An event that’s represented by a string of the form
"<event_name>", whereevent_namecan be any of Tkinter’s eventsAn event handler that’s the name of the function to be called whenever the event occurs
The event handler is bound to the widget on which .bind() is called. When the event handler is called, the event object is passed to the event handler function.
In the example above, the event handler is bound to the window itself, but you can bind an event handler to any widget in your application. For example, you can bind an event handler to a Button widget that will perform some action whenever the button is pressed:
In this example, the "<Button-1>" event on the button widget is bound to the handle_click event handler. The "<Button-1>" event occurs whenever the left mouse button is pressed while the mouse is over the widget. There are other events for mouse button clicks, including "<Button-2>" for the middle mouse button and "<Button-3>" for the right mouse button.
Note: For a list of commonly used events, see the Event types section of the Tkinter 8.5 reference.
You can bind any event handler to any kind of widget with .bind(), but there’s an easier way to bind event handlers to button clicks using the Button widget’s command attribute.
Using command
commandEvery Button widget has a command attribute that you can assign to a function. Whenever the button is pressed, the function is executed.
Take a look at an example. First, you’ll create a window with a Label widget that holds a numerical value. You’ll put buttons on the left and right side of the label. The left button will be used to decrease the value in the Label, and the right one will increase the value. Here’s the code for the window:
The window looks like this:
With the app layout defined, you can bring it to life by giving the buttons some commands. Start with the left button. When this button is pressed, it should decrease the value in the label by 1. There are two things you need to know how to do in order to do this:
How do you get the text in a
Label?How do you update the text in a
Label?
Label widgets don’t have .get() like Entry and Text widgets do. However, you can retrieve the text from the label by accessing the text attribute with a dictionary-style subscript notation:
Now that you know how to get and set a label’s text, write a function increase() that increases the value in the lbl_value by 1:
increase() gets the text from lbl_value and converts it to an integer with int(). Then, it increases this value by 1 and sets the label’s text attribute to this new value.
You’ll also need decrease() to decrease the value in value_label by 1:
Put increase() and decrease() in your code just after the import statement.
To connect the buttons to the functions, assign the function to the button’s command attribute. You can do this when you instantiate the button. For example, to assign increase() to increase_button, update the line that instantiates the button to the following:
Now assign decrease() to decrease_button:
That’s all you need to do to bind the buttons to increase() and decrease() and make the program functional. Try saving your changes and running the application! Click the buttons to increase and decrease the value in the center of the window:
Here’s the full application code for your reference:
Counter Application Full Source CodeShow/Hide
This app is not particularly useful, but the skills you learned here apply to every app you’ll make:
Use widgets to create the components of the user interface.
Use geometry managers to control the layout of the application.
Write functions that interact with various components to capture and transform user input.
In the next two sections, you’ll build apps that do something useful. First, you’ll build a temperature converter that converts a temperature value from Fahrenheit to Celsius. After that, you’ll build a text editor that can open, edit, and save text files! Remove ads
Check Your Understanding
Expand the code block below for an exercise to check your understanding:
Exercise: Simulate rolling a six-sided dieShow/Hide
You can expand the code block below to see a solution:
Solution: Simulate rolling a six-sided dieShow/Hide
When you’re ready, you can move on to the next section.
Building a Temperature Converter (Example App)
In this section, you’ll build a temperature converter application that allows the user to input temperature in degrees Fahrenheit and push a button to convert that temperature to degrees Celsius. You’ll walk through the code step by step. You can also find the full source code at the end of this section for your reference.
Note: To get the most out of this section, follow along in a Python shell.
Before you start coding, you’ll first design the app. You need three elements:
An
Entrywidget calledent_temperatureto enter the Fahrenheit valueA
Labelwidget calledlbl_resultto display the Celsius resultA
Buttonwidget calledbtn_convertthat reads the value from theEntrywidget, converts it from Fahrenheit to Celsius, and sets the text of theLabelwidget to the result when clicked
You can arrange these in a grid with a single row and one column for each widget. That gets you a minimally working application, but it isn’t very user-friendly. Everything needs to have labels.
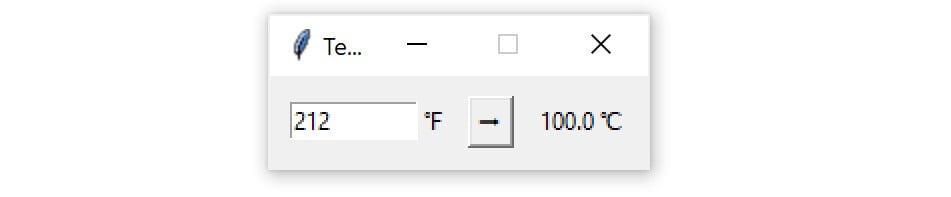
You’ll put a label directly to the right of the ent_temperature widget containing the Fahrenheit symbol (℉) so that the user knows that the value ent_temperature should be in degrees Fahrenheit. To do this, set the label text to "\N{DEGREE FAHRENHEIT}", which uses Python’s named Unicode character support to display the Fahrenheit symbol.
You can give btn_convert a little flair by setting it’s text to the value "\N{RIGHTWARDS BLACK ARROW}", which displays a black arrow pointing to the right. You’ll also make sure that lbl_result always has the Celsius symbol (℃) following the label text "\N{DEGREE CELSIUS}" to indicate that the result is in degrees Celsius. Here’s what the final window will look like:
Now that you know what widgets you need and what the window is going to look like, you can start coding it up! First, import tkinter and create a new window:
window.title() sets the title of an existing window. When you finally run this application, the window will have the text Temperature Converter in its title bar. Next, create the ent_temperature widget with a label called lbl_temp and assign both to a Frame widget called frm_entry:
ent_temperature is where the user will enter the Fahrenheit value. lbl_temp is used to label ent_temperature with the Fahrenheit symbol. frm_entry is a container that groups ent_temperature and lbl_temp together.
You want lbl_temp to be placed directly to the right of ent_temperature. You can lay them out in the frm_entry using the .grid() geometry manager with one row and two columns:
You’ve set the sticky parameter to "e" for ent_temperature so that it always sticks to the right-most edge of its grid cell. You also set sticky to "w" for lbl_temp to keep it stuck to the left-most edge of its grid cell. This ensures that lbl_temp is always located immediately to the right of ent_temperature.
Now, make the btn_convert and the lbl_result for converting the temperature entered into ent_temperature and displaying the results:
Like frm_entry, both btn_convert and lbl_result are assigned to window. Together, these three widgets make up the three cells in the main application grid. Use .grid() to go ahead and lay them out now:
Finally, run the application:
That looks great! But the button doesn’t do anything just yet. At the top of your script file, just below the import line, add a function called fahrenheit_to_celsius():
This function reads the value from ent_temperature, converts it from Fahrenheit to Celsius, and then displays the result in lbl_result.
Now go down to the line where you define btn_convert and set its command parameter to fahrenheit_to_celsius:
That’s it! You’ve created a fully functional temperature converter app in just 26 lines of code! Pretty cool, right?
You can expand the code block below to see the full script:
Temperature Converter Full Source CodeShow/Hide
It’s time to kick things up a notch! Read on to learn how to build a text editor.
Building a Text Editor (Example App)
In this section, you’ll build a text editor application that can create, open, edit, and save text files. There are three essential elements in the application:
A
Buttonwidget calledbtn_openfor opening a file for editingA
Buttonwidget calledbtn_savefor saving a fileA
TextBoxwidget calledtxt_editfor creating and editing the text file
The three widgets will be arranged so that the two buttons are on the left-hand side of the window, and the text box is on the right-hand side. The whole window should have a minimum height of 800 pixels, and txt_edit should have a minimum width of 800 pixels. The whole layout should be responsive so that if the window is resized, then txt_edit is resized as well. The width of the Frame holding the buttons should not change, however.
Here’s a sketch of how the window will look:
You can achieve the desired layout using the .grid() geometry manager. The layout contains a single row and two columns:
A narrow column on the left for the buttons
A wider column on the right for the text box
To set the minimum sizes for the window and txt_edit, you can set the minsize parameters of the window methods .rowconfigure() and .columnconfigure() to 800. To handle resizing, you can set the weight parameters of these methods to 1.
In order to get both buttons into the same column, you’ll need to create a Frame widget called fr_buttons. According to the sketch, the two buttons should be stacked vertically inside of this frame, with btn_open on top. You can do that with either the .grid() or .pack() geometry manager. For now, you’ll stick with .grid() since it’s a little easier to work with.
Now that you have a plan, you can start coding the application. The first step is to create the all of the widgets you need:
Here’s a breakdown of this code:
Line 1 imports
tkinter.Lines 3 and 4 create a new window with the title
"Simple Text Editor".Lines 6 and 7 set the row and column configurations.
Lines 9 to 12 create the four widgets you’ll need for the text box, the frame, and the open and save buttons.
Take a look at line 6 more closely. The minsize parameter of .rowconfigure() is set to 800 and weight is set to 1:
The first argument is 0, which sets the height of the first row to 800 pixels and makes sure that the height of the row grows proportionally to the height of the window. There’s only one row in the application layout, so these settings apply to the entire window.
Let’s also take a closer look at line 7. Here, you use .columnconfigure() to set the width and weight attributes of the column with index 1 to 800 and 1, respectively:
Remember, row and column indices are zero-based, so these settings apply only to the second column. By configuring just the second column, the text box will expand and contract naturally when the window is resized, while the column containing the buttons will remain at a fixed width.
Now you can work on the application layout. First, assign the two buttons to the fr_buttons frame using the .grid() geometry manager:
These two lines of code create a grid with two rows and one column in the fr_buttons frame since both btn_open and btn_save have their master attribute set to fr_buttons. btn_open is put in the first row and btn_save in the second row so that btn_open appears above btn_save in the layout, just you planned in your sketch.
Both btn_open and btn_save have their sticky attributes set to "ew", which forces the buttons to expand horizontally in both directions and fill the entire frame. This makes sure both buttons are the same size.
You place 5 pixels of padding around each button by setting the padx and pady parameters to 5. Only btn_open has vertical padding. Since it’s on top, the vertical padding offsets the button down from the top of the window a bit and makes sure that there’s a small gap between it and btn_save.
Now that fr_buttons is laid out and ready to go, you can set up the grid layout for the rest of the window:
These two lines of code create a grid with one row and two columns for window. You place fr_buttons in the first column and txt_edit in the second column so that fr_buttons appears to the left of txt_edit in the window layout.
The sticky parameter for fr_buttons is set to "ns", which forces the whole frame to expand vertically and fill the entire height of its column. txt_edit fills its entire grid cell because you set its sticky parameter to "nsew", which forces it to expand in every direction.
Now that the application layout is complete, add window.mainloop() to the bottom of the program and save and run the file. The following window is displayed:
That looks great! But it doesn’t do anything just yet, so you need to start writing the commands for the buttons. btn_open needs to show a file open dialog and allow the user to select a file. It then needs to open that file and set the text of txt_edit to the contents of the file. Here’s a function open_file() that does just this:
Here’s a breakdown of this function:
Lines 3 to 5 use the
askopenfilenamedialog from thetkinter.filedialogmodule to display a file open dialog and store the selected file path tofilepath.Lines 6 and 7 check to see if the user closes the dialog box or clicks the Cancel button. If so, then
filepathwill beNone, and the function willreturnwithout executing any of the code to read the file and set the text oftxt_edit.Line 8 clears the current contents of
txt_editusing.delete().Lines 9 and 10 open the selected file and
.read()its contents before storing thetextas a string.Line 11 assigns he string
texttotxt_editusing.insert().Line 12 sets the title of the window so that it contains the path of the open file.
Now you can update the program so that btn_open calls open_file() whenever it’s clicked. There are a few things you need to do to update the program. First, import askopenfilename() from tkinter.filedialog by adding the following import to the top of your program:
Next, add the definition of open_file() just below the import statements:
Finally, set the command attribute of btn_opn to open_file:
Save the file and run it to check that everything is working. Then try opening a text file!
With btn_open working, it’s time to work on the function for btn_save. This needs to open a save file dialog box so that the user can choose where they would like to save the file. You’ll use the asksaveasfilename dialog in the tkinter.filedialog module for this. This function also needs to extract the text currently in txt_edit and write this to a file at the selected location. Here’s a function that does just this:
Here’s how this code works:
Lines 3 to 6 use the
asksaveasfilenamedialog box to get the desired save location from the user. The selected file path is stored in thefilepathvariable.Lines 7 and 8 check to see if the user closes the dialog box or clicks the Cancel button. If so, then
filepathwill beNone, and the function will return without executing any of the code to save the text to a file.Line 9 creates a new file at the selected file path.
Line 10 extracts the text from
txt_editwith.get()method and assigns it to the variabletext.Line 11 writes
textto the output file.Line 12 updates the title of the window so that the new file path is displayed in the window title.
Now you can update the program so that btn_save calls save_file() when it’s clicked. Again, there are a few things you need to do in order to update the program. First, import asksaveasfilename() from tkinter.filedialog by updating the import at the top of your script, like so:
Next, add the definition of save_file() just below the open_file() definition:
Finally, set the command attribute of btn_save to save_file:
Save the file and run it. You’ve now got a minimal yet fully-functional text editor!
You can expand the code block below to see the full script:
Text Editor Application Full Source CodeShow/Hide
You’ve now built two GUI applications in Python and applied many of the topics you’ve learned about throughout this tutorial. That’s no small achievement, so take some time to feel good about what you’ve done. You’re now ready to tackle some applications on your own!
Conclusion
In this tutorial, you learned how to get started with Python GUI programming. Tkinter is a compelling choice for a Python GUI framework because it’s built into the Python standard library, and it’s relatively painless to make applications with this framework.
Throughout this tutorial, you’ve learned several important Tkinter concepts:
How to work with widgets
How to control your application layout with geometry managers
How to make your applications interactive
How to use five basic Tkinter widgets (
Label,Button,Entry,Text, andFrame)
Now that you’ve mastered the foundations of Python GUI programming with Tkinter, the next step is to build some of your own applications. What will you create? Share your fun projects down in the comments below!
Additional Resources
In this tutorial, you touched on just the foundations of creating Python GUI applications with Tkinter. There are a number of additional topics that aren’t covered here. In this section, you’ll find some of the best resources available to help you continue on your journey.
Tkinter References
Here are some official resources to check out:
The official Python Tkinter tutorial covers Python’s Tkinter module in moderate depth. It’s written for more advanced Python developers and is not the best resource for beginners.
Tkinter 8.5 reference: a GUI for Python is an extensive reference covering the majority of the Tkinter module. It’s exhaustive, but it’s written in the reference style without commentary or examples.
The Tk Commands reference is the definitive guide to commands in the Tk library. It’s written for the Tcl language, but it answers a lot of questions about why things work the way they do in Tkinter. The official Python docs have a section on mapping basic Tk into Tkinter that’s indispensable when you’re reading the Tk Commands doc.
Additional Widgets
In this tutorial, you learned about the Label, Button, Entry, Text, and Frame widgets. There are several other widgets in Tkinter, all of which are essential for building real-world applications. Here are some resources to continue learning about widgets:
The TkDocs Tkinter Tutorial is a fairly comprehensive guide for Tk, the underlying code library used by Tkinter. Examples are presented in Python, Ruby, Perl, and Tcl. You can find several examples of widgets beyond those covered here in two sections:
Basic Widgets covers the same widgets as this tutorial, plus a few more.
More Widgets covers several additional widgets.
The official Python docs have three sections covering additional widgets:
ttk themed widgets covers the Tk themed widget set.
Extension widgets for Tk covers widgets in the Tk Interface Extension set.
Scrolled Text Widget details a
Textwidget combined with a vertical scroll bar.
Application Distribution
Once you’ve created an application with Tkinter, you probably want to distribute that to your colleagues and friends. Here are some tutorials to get you going with that process:
Other GUI Frameworks
Tkinter is not your only choice for a Python GUI framework. If Tkinter doesn’t meet the needs of your project, then here are some other frameworks to consider:
Reference : https://realpython.com/python-gui-tkinter/
Last updated


