> For the complete documentation index, see [llms.txt](https://yo-sarawut.gitbook.io/tutorials/llms.txt). Markdown versions of documentation pages are available by appending `.md` to page URLs; this page is available as [Markdown](https://yo-sarawut.gitbook.io/tutorials/tutorials/css/box-shadow.md).

# Box Shadow

## Box Shadow CSS Tutorial – How to Add a Drop Shadow to Any HTML Element

![](/files/-MCbUpaPIfl47WjQKcOh)

We can add a drop shadow to any HTML element using the CSS property `box-shadow`. Here's how.

### Adding a Basic Drop Shadow <a href="#addingabasicdropshadow" id="addingabasicdropshadow"></a>

Let's first set up some basic HTML elements to add our drop shadows to:

```markup
<div id="box1" class="box">Box1</div>
<div id="box2" class="box">Box2</div>
<div id="box3" class="box">Box3</div>
```

Then add some basic CSS:

```css
p {
    padding: 10px;
}
.box {
    padding: 20px;
    width: 50%;
    margin: 30px auto;
    background: #000;
    color: #fff;
}
```

The result is just three black boxes that will be easy for us to add drop shadows to by calling their unique id's:HTML elements setup

![HTML elements setup](https://www.freecodecamp.org/news/content/images/2020/05/html-elements-1.png)

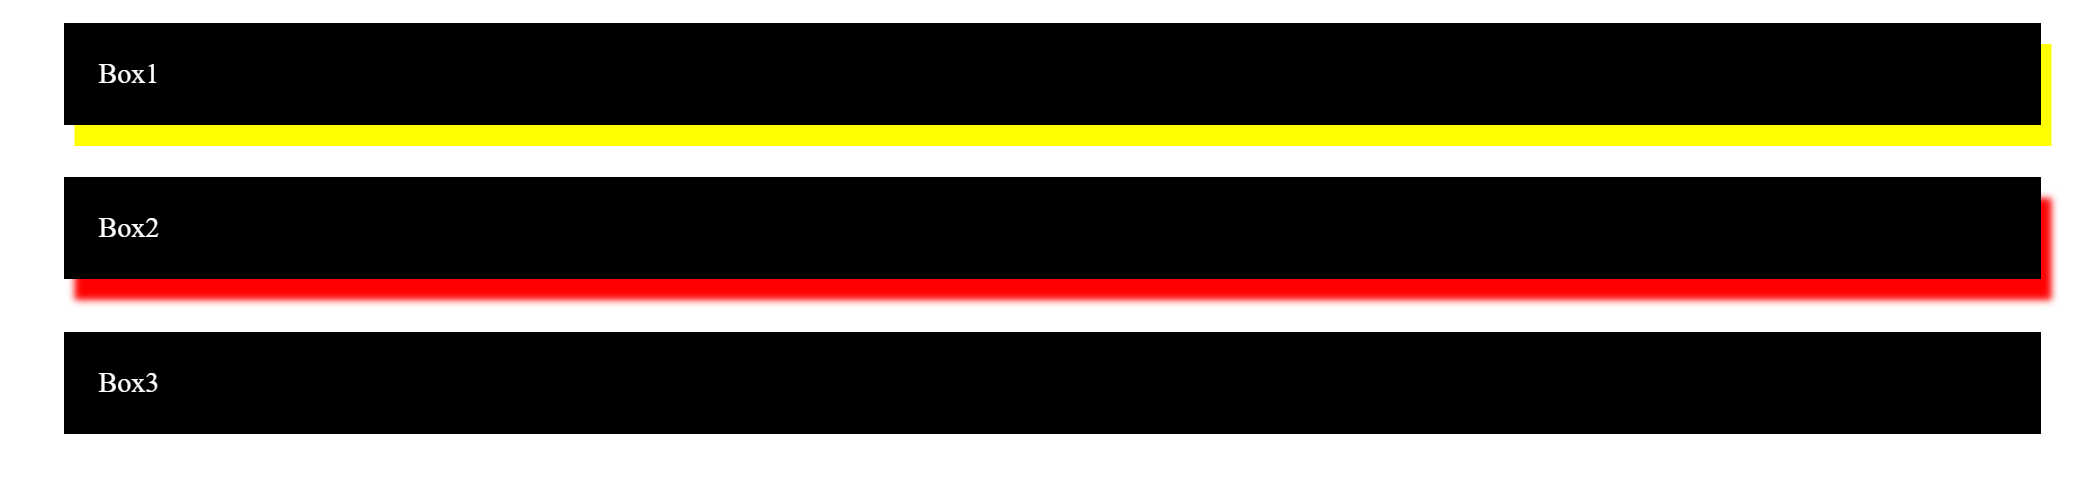
To add a basic drop shadow, let's use the `box-shadow` property on the Box 1:

```css
/* offset-x | offset-y | color */
#box1 {
    box-shadow: 6px 12px yellow;
}
```

![Adding a basic drop shadow to Box 1](https://www.freecodecamp.org/news/content/images/2020/05/box1.png)

We have 3 parameters here. The first 2 are, respectively, the x-offset and y-offset. They set the location of the drop shadow.

The offset is relative to the origin, which in HTML is always the top left corner of an element. A positive x-offset will move the shadow to the right, and a positive y-offset will move the shadow downwards.

The third parameter is the color of your drop shadow.

Keep in mind that although we used `<div>` elements here, the `box-shadow` property can be applied to any other HTML element as well.

### Adding a Blur Radius <a href="#addingablurradius" id="addingablurradius"></a>

If we want the shadow to look a little more realistic, we will want to experiment with the `blur-radius` parameter.

This parameter controls how much to blur the shadow such that it becomes bigger and lighter. Let's apply it to Box 2:

```css
/* offset-x | offset-y | blur-radius | color */
#box2 {
	box-shadow: 6px 12px 4px red;
}
```
![Adding a blur radius to Box 2](https://www.freecodecamp.org/news/content/images/2020/05/box2-blur.png)

The value of 4px sets the radius of the blur to apply to our drop shadow.

### Adding a Spread Radius <a href="#addingaspreadradius" id="addingaspreadradius"></a>

If we want to control the size of the shadow, we can use the `spread-radius` parameter which controls how much a shadow grows or shrinks.

Let's add a spread radius of 8px to Box 2:

```css
/* offset-x | offset-y | blur-radius | spread-radius | color */
#box2 {
    box-shadow: 6px 12px 4px 8px red;
}
```

Adding a spread radius in addition to a blur to Box 2
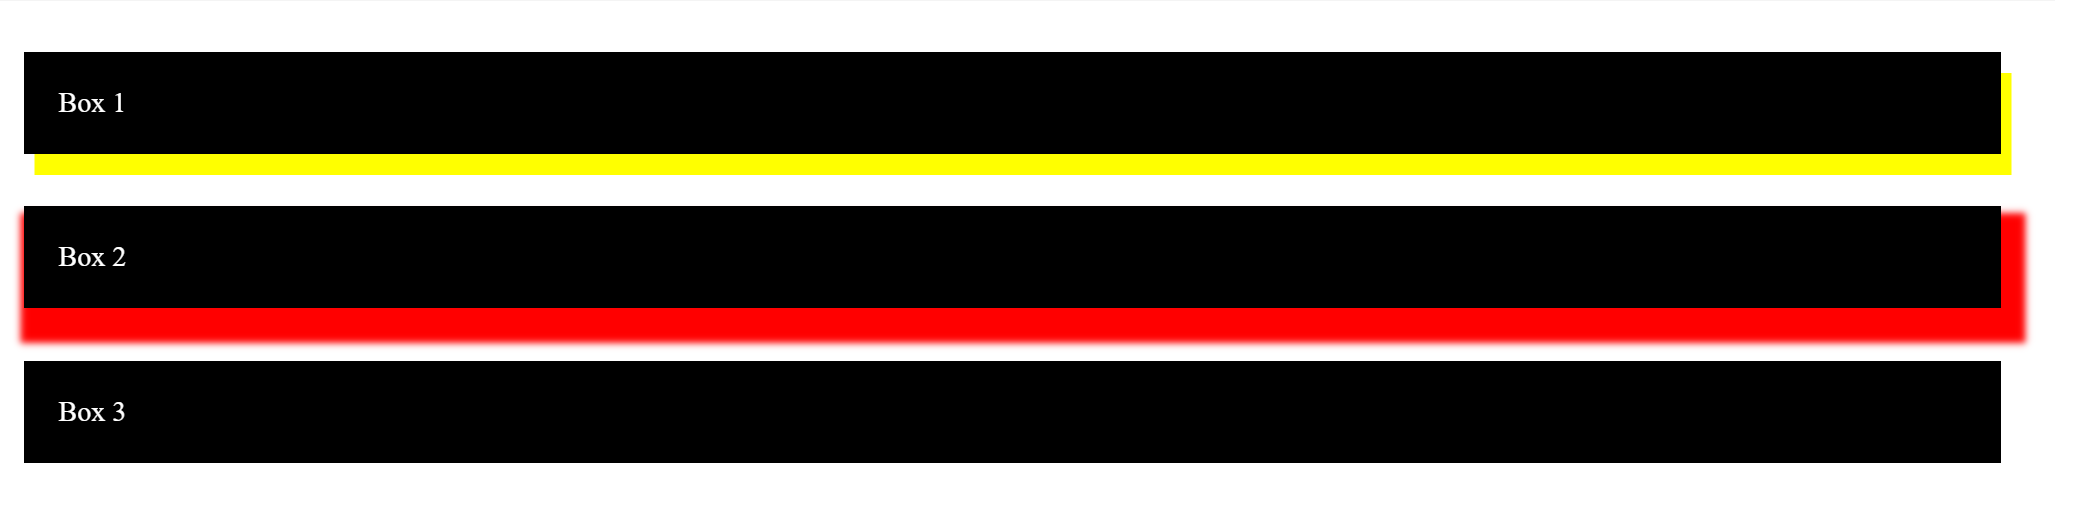
![Adding a spread radius in addition to a blur to Box 2](https://www.freecodecamp.org/news/content/images/2020/05/box2-blur-and-spread.png)

Remember the order of these parameters!

### Combining Multiple Shadows in a Single Property <a href="#combiningmultipleshadowsinasingleproperty" id="combiningmultipleshadowsinasingleproperty"></a>

If we want to get fancy, we can add multiple drop shadows to an element using a single `box-shadow` property.

Let's do that with Box 3 by simultaneously adding a blue and green drop shadow:

```css
/* Any number of shadows, separated by commas */
#box3 {
    box-shadow: 6px 12px 2px 2px blue, -6px -12px 2px 2px green;
}
```

Adding multiple drop shadows to Box 3

![combine multiple drop shadows](https://www.freecodecamp.org/news/content/images/2020/05/box3.png)

### Bonus: Create an Inset Shadow <a href="#bonuscreateaninsetshadow" id="bonuscreateaninsetshadow"></a>

While it will not create a drop shadow, the `inset` parameter can also be used with the `box-shadow` property.

As the name suggests, this parameter creates an inset shadow (i.e. shadow inside a box).

The `inset` parameter can be placed either at the beginning or the end of the\
`box-shadow` property. Here we demonstrate its use with a `blockquote` element.

HTML:

```markup
<blockquote>
  <q>The key to success is to start before you're ready.</q>
  <p>&mdash; Marie Forleo</p>
</blockquote>
```

CSS:

```css
blockquote {
  width: 50%;
  margin: 50px auto;
  padding: 20px;
  font-size: 24px;
  box-shadow: inset 10px 5px black;
}
```

![Create an inset shadow](https://www.freecodecamp.org/news/content/images/2020/05/blockquote.png)

Of course you can add some blur and spread to enhance the shadow, or even multiple shadows:

```css
 box-shadow: inset 10px 5px 25px 5px black, 5px 5px 12px 2px black;
```

![Inset shadow combined with drop shadow](https://www.freecodecamp.org/news/content/images/2020/05/blockquote-enhanced.png)

With the `box-shadow` property, we can easily make elements on a web page stand out to create a nice 3D lighting effect.

If you want to do some experimenting yourself, here's a [code pen](https://codepen.io/1000mileworld/pen/dyYeggy) I created with the examples used in this tutorial.

Play around and see what you can come up with!

### Want to See More Web Development Tips and Knowledge? <a href="#wanttoseemorewebdevelopmenttipsandknowledge" id="wanttoseemorewebdevelopmenttipsandknowledge"></a>

* [Subscribe](https://1000mileworld.com/#post) to my weekly newsletter
* Visit my blog at  [1000 Mile World](https://1000mileworld.com/)
* [Follow me](https://twitter.com/1000mileworld) on Twitter

Reference : <https://www.freecodecamp.org/news/css-tutorial-drop-shadow/>
